Home
Welcome to the niri wiki!
Check out the available pages on the right.
The wiki is open to contribution, but please discuss bigger changes in our Matrix room first! The wiki is generated from files in the wiki/ folder of the repository, so you can open a pull request modifying it there.
Getting Started
The easiest way to get niri is to install one of the distribution packages. Here are some of them: Fedora COPR and nightly COPR (which I maintain myself), NixOS Flake, and some more from repology below. See the Building section if you'd like to compile niri yourself and the Packaging niri page if you want to package niri.
![]()
After installing, start niri from your display manager like GDM. Press SuperT to run a terminal (Alacritty) and SuperD to run an application launcher (fuzzel). To exit niri, press SuperShiftE.
If you're not using a display manager, you should run niri-session (systemd/dinit) or niri --session (others) from a TTY.
The --session flag will make niri import its environment variables globally into the system manager and D-Bus, and start its D-Bus services.
The niri-session script will additionally start niri as a systemd/dinit service, which starts up a graphical session target required by some services like portals.
You can also run niri inside an existing desktop session.
Then it will open as a window, where you can give it a try.
Note that this windowed mode is mainly meant for development, so it is a bit buggy (in particular, there are issues with hotkeys).
Next, see the list of important software required for normal desktop use, like a notification daemon and portals. Also, check the configuration introduction page to get started configuring niri. There you can find links to other pages containing thorough documentation and examples for all options. Finally, the Xwayland page explains how to run X11 applications on niri.
NVIDIA
NVIDIA GPUs can have problems running niri (for example, the screen remains black upon starting from a TTY). Sometimes, the problems can be fixed. You can try the following:
- Update NVIDIA drivers. You need a GPU and drivers recent enough to support GBM.
- Make sure kernel modesetting is enabled. This usually involves adding
nvidia-drm.modeset=1to the kernel command line. Find and follow a guide for your distribution. Guides from other Wayland compositors can help.
Asahi, ARM, and other kmsro devices
On some of these systems, niri fails to correctly detect the primary render device. If you're getting a black screen when starting niri on a TTY, you can try to set the device manually.
First, find which devices you have:
$ ls -l /dev/dri/
drwxr-xr-x@       - root 14 мая 07:07 by-path
crw-rw----@   226,0 root 14 мая 07:07 card0
crw-rw----@   226,1 root 14 мая 07:07 card1
crw-rw-rw-@ 226,128 root 14 мая 07:07 renderD128
crw-rw-rw-@ 226,129 root 14 мая 07:07 renderD129
You will likely have one render device and two card devices.
Open the niri config file at ~/.config/niri/config.kdl and put your render device path like this:
debug {
    render-drm-device "/dev/dri/renderD128"
}
Save, then try to start niri again.
If you still get a black screen, try using each of the card devices.
Nix/NixOS
There's a common problem of mesa drivers going out of sync with niri, so make sure your system mesa version matches the niri mesa version. When this happens, you usually see a black screen when trying to start niri from a TTY.
Also, on Intel graphics, you may need a workaround described here.
Virtual Machines
To run niri in a VM, make sure to enable 3D acceleration.
Main Default Hotkeys
When running on a TTY, the Mod key is Super. When running in a window, the Mod key is Alt.
The general system is: if a hotkey switches somewhere, then adding Ctrl will move the focused window or column there.
| Hotkey | Description |
|---|---|
| ModShift/ | Show a list of important niri hotkeys |
| ModT | Spawn alacritty (terminal) |
| ModD | Spawn fuzzel (application launcher) |
| SuperAltL | Spawn swaylock (screen locker) |
| ModQ | Close the focused window |
| ModH or Mod← | Focus the column to the left |
| ModL or Mod→ | Focus the column to the right |
| ModJ or Mod↓ | Focus the window below in a column |
| ModK or Mod↑ | Focus the window above in a column |
| ModCtrlH or ModCtrl← | Move the focused column to the left |
| ModCtrlL or ModCtrl→ | Move the focused column to the right |
| ModCtrlJ or ModCtrl↓ | Move the focused window below in a column |
| ModCtrlK or ModCtrl↑ | Move the focused window above in a column |
| ModShiftHJKL or ModShift←↓↑→ | Focus the monitor to the side |
| ModCtrlShiftHJKL or ModCtrlShift←↓↑→ | Move the focused column to the monitor to the side |
| ModU or ModPageDown | Switch to the workspace below |
| ModI or ModPageUp | Switch to the workspace above |
| ModCtrlU or ModCtrlPageDown | Move the focused column to the workspace below |
| ModCtrlI or ModCtrlPageUp | Move the focused column to the workspace above |
| ModShiftU or ModShiftPageDown | Move the focused workspace down |
| ModShiftI or ModShiftPageUp | Move the focused workspace up |
| Mod, | Consume the window to the right into the focused column |
| Mod. | Expel the bottom window in the focused column into its own column |
| Mod[ | Consume or expel the focused window to the left |
| Mod] | Consume or expel the focused window to the right |
| ModR | Toggle between preset column widths |
| ModShiftR | Toggle between preset column heights |
| ModF | Maximize column |
| ModC | Center column within view |
| Mod- | Decrease column width by 10% |
| Mod= | Increase column width by 10% |
| ModShift- | Decrease window height by 10% |
| ModShift= | Increase window height by 10% |
| ModCtrlR | Reset window height back to automatic |
| ModShiftF | Toggle full-screen on the focused window |
| ModV | Move the focused window between the floating and the tiling layout |
| ModShiftV | Switch focus between the floating and the tiling layout |
| PrtSc | Take an area screenshot. Select the area to screenshot with mouse, then press Space to save the screenshot, or Escape to cancel |
| AltPrtSc | Take a screenshot of the focused window to clipboard and to ~/Pictures/Screenshots/ |
| CtrlPrtSc | Take a screenshot of the focused monitor to clipboard and to ~/Pictures/Screenshots/ |
| ModShiftE or CtrlAltDelete | Exit niri |
Building
First, install the dependencies for your distribution.
-
Ubuntu 24.04:
sudo apt-get install -y gcc clang libudev-dev libgbm-dev libxkbcommon-dev libegl1-mesa-dev libwayland-dev libinput-dev libdbus-1-dev libsystemd-dev libseat-dev libpipewire-0.3-dev libpango1.0-dev libdisplay-info-dev -
Fedora:
sudo dnf install gcc libudev-devel libgbm-devel libxkbcommon-devel wayland-devel libinput-devel dbus-devel systemd-devel libseat-devel pipewire-devel pango-devel cairo-gobject-devel clang libdisplay-info-devel
Next, get latest stable Rust: https://rustup.rs/
Then, build niri with cargo build --release.
Check Cargo.toml for a list of build features.
For example, you can replace systemd integration with dinit integration using cargo build --release --no-default-features --features dinit,dbus,xdp-gnome-screencast.
warning
Do NOT build with --all-features!
Some features are meant only for development use. For example, one of the features enables collection of profiling data into a memory buffer that will grow indefinitely until you run out of memory.
NixOS/Nix
We have a community-maintained flake which provides a devshell with required dependencies. Use nix build to build niri, and then run ./results/bin/niri.
If you're not on NixOS, you may need NixGL to run the resulting binary:
nix run --impure github:guibou/nixGL -- ./results/bin/niri
Manual Installation
If installing directly without a package, the recommended file destinations are slightly different. In this case, put the files in the directories indicated in the table below. These may vary depending on your distribution.
Don't forget to make sure that the path to niri in niri.service is correct.
This defaults to /usr/bin/niri.
| File | Destination |
|---|---|
target/release/niri | /usr/local/bin/ |
resources/niri-session | /usr/local/bin/ |
resources/niri.desktop | /usr/local/share/wayland-sessions/ |
resources/niri-portals.conf | /usr/local/share/xdg-desktop-portal/ |
resources/niri.service (systemd) | /etc/systemd/user/ |
resources/niri-shutdown.target (systemd) | /etc/systemd/user/ |
resources/dinit/niri (dinit) | /etc/dinit.d/user/ |
resources/dinit/niri-shutdown (dinit) | /etc/dinit.d/user/ |
Example systemd Setup
When starting niri from a display manager like GDM, or otherwise through the niri-session binary, it runs as a systemd service.
This provides the necessary systemd integration to run programs like mako and services like xdg-desktop-portal bound to the graphical session.
Here's an example on how you might set up mako, waybar, swaybg and swayidle to run as systemd services with niri.
Unlike spawn-at-startup, this lets you easily monitor their status and output, and restart or reload them.
-
Install them, i.e.
sudo dnf install mako waybar swaybg swayidle -
makoandwaybarprovide systemd units out of the box, so you can simply add them to the niri session:systemctl --user add-wants niri.service mako.service systemctl --user add-wants niri.service waybar.serviceThis will create links in
~/.config/systemd/user/niri.service.wants/, a special systemd folder for services that need to start together withniri.service. -
swaybgdoes not provide a systemd unit, since you need to pass the background image as a command-line argument. So we will make our own. Create~/.config/systemd/user/swaybg.servicewith the following contents:[Unit] PartOf=graphical-session.target After=graphical-session.target Requisite=graphical-session.target [Service] ExecStart=/usr/bin/swaybg -m fill -i "%h/Pictures/LakeSide.png" Restart=on-failureReplace the image path with the one you want.
%his expanded to your home directory.After editing
swaybg.service, runsystemctl --user daemon-reloadso systemd picks up the changes in the file.Now, add it to the niri session:
systemctl --user add-wants niri.service swaybg.service -
swayidlesimilarly does not provide a service, so we will also make our own. Create~/.config/systemd/user/swayidle.servicewith the following contents:[Unit] PartOf=graphical-session.target After=graphical-session.target Requisite=graphical-session.target [Service] ExecStart=/usr/bin/swayidle -w timeout 601 'niri msg action power-off-monitors' timeout 600 'swaylock -f' before-sleep 'swaylock -f' Restart=on-failureThen, run
systemctl --user daemon-reloadand add it to the niri session:systemctl --user add-wants niri.service swayidle.service
That's it!
Now these three utilities will be started together with the niri session and stopped when it exits.
You can also restart them with a command like systemctl --user restart waybar.service, for example after editing their config files.
To remove a service from niri startup, remove its symbolic link from ~/.config/systemd/user/niri.service.wants/.
Then, run systemctl --user daemon-reload.
Running Programs Across Logout
When running niri as a session, exiting it (logging out) will kill all programs that you've started within. However, sometimes you want a program, like tmux, dtach or similar, to persist in this case. To do this, run it in a transient systemd scope:
systemd-run --user --scope tmux new-session
Important Software
Since niri is not a complete desktop environment, you will very likely want to run the following software to make sure that other apps work fine.
Notification Daemon
Many apps need one. For example, mako works well. Use a systemd setup or spawn-at-startup.
Portals
These provide a cross-desktop API for apps to use for various things like file pickers or UI settings. Flatpak apps in particular require working portals.
Portals require running niri as a session, which means through the niri-session script or from a display manager. You will want the following portals installed:
xdg-desktop-portal-gtk: implements most of the basic functionality, this is the "default fallback portal".xdg-desktop-portal-gnome: required for screencasting support.gnome-keyring: implements the Secret portal, required for certain apps to work.
Then systemd should start them on-demand automatically. These particular portals are configured in niri-portals.conf which must be installed in the correct location.
Since we're using xdg-desktop-portal-gnome, Flatpak apps will read the GNOME UI settings. For example, to enable the dark style, run:
dconf write /org/gnome/desktop/interface/color-scheme '"prefer-dark"'
Note that if you're using the provided resources/niri-portals.conf, you also need to install the nautilus file manager in order for file chooser dialogues to work properly. This is necessary because xdg-desktop-portal-gnome uses nautilus as the file chooser by default starting from version 47.0.
If you do not want to install nautilus (say you use nemo instead), you can set org.freedesktop.impl.portal.FileChooser=gtk; in niri-portals.conf to use the GTK portal for file chooser dialogues.
Authentication Agent
Required when apps need to ask for root permissions. Something like plasma-polkit-agent works fine. Start it with systemd or with spawn-at-startup.
Note that to start plasma-polkit-agent with systemd on Fedora, you'll need to override its systemd service to add the correct dependency. Run:
systemctl --user edit --full plasma-polkit-agent.service
Then add After=graphical-session.target.
Xwayland
To run X11 apps like Steam or Discord, you can use xwayland-satellite. Check the Xwayland wiki page for instructions.
Workspaces
Overview
Niri has dynamic workspaces that can move between monitors.
Each monitor contains an independent set of workspaces arranged vertically.
You can switch between workspaces on a monitor with focus-workspace-down and focus-workspace-up.
Empty workspaces "in the middle" automatically disappear when you switch away from them.
There's always one empty workspace at the end (at the bottom) of every monitor. When you open a window on this empty workspace, a new empty workspace will immediately appear further below it.
You can move workspaces up and down on the monitor with move-workspace-up/down.
The way to put a window on a new workspace "in the middle" is to put it on the last (empty) workspace, then move the workspace up to where you need.
Here's a visual representation that shows two monitors and their workspaces. The left monitor has three workspaces (two with windows, plus one empty), and the right monitor has two workspaces (one with windows, plus one empty).

You can move a workspace to a different monitor using binds like move-workspace-to-monitor-left/right/up/down and move-workspace-to-monitor-next/previous.
When you disconnect a monitor, its workspaces will automatically move to a different monitor. But, they will also "remember" their original monitor, so when you reconnect it, the workspaces will automatically move back to it.
tip
From other tiling WMs, you may be used to thinking about workspaces like this: "These are all of my workspaces. I can show workspace X on my first monitor, and workspace Y on my second monitor." In niri, instead, think like this: "My first monitor contains these workspaces, including X and Y, and my second monitor contains these other workspaces. I can switch my first monitor to workspace X or Y. I can move workspace Y to my second monitor to show it there."
Addressing workspaces by index
Several actions in niri can address workspaces "by index": focus-workspace 2, move-column-to-workspace 4.
This index refers to whichever workspace currently happens to be at this position on the focused monitor.
So, focus-workspace 2 will always put you on the second workspace of the monitor, whichever workspace that currently is.
This is an important distinction from WMs with static workspace systems.
In niri, workspaces do not have indices on their own.
If you take the first workspace and move it further down on the monitor, focus-workspace 1 will now put you on a different workspace (the one that was below the first workspace before you moved it).
When you want to have a more permanent workspace in niri, you can create a named workspace in the config or via the set-workspace-name action.
You can refer to named workspaces by name, e.g. focus-workspace "browser", and they won't disappear when they become empty.
tip
You can try to emulate static workspaces by creating workspaces named "one", "two", "three", ..., and binding keys to focus-workspace "one", focus-workspace "two", ...
This can work to some extent, but it can become somewhat confusing, since you can still move these workspaces up and down and between monitors.
If you're coming from a static workspace WM, I suggest not doing that, but instead trying the "niri way" with dynamic workspaces, focusing and moving up/down instead of by index. Thanks to scrollable tiling, you generally need fewer workspaces than on a traditional tiling WM.
Example workflow
This is how I like to use workspaces.
I will usually have my browser on the topmost workspace, then one workspace per project (or a "thing") I'm working on. On a single workspace I have 1–2 windows that fit inside a monitor that I switch between frequently, and maybe extra windows scrolled outside the view, usually either ones I need rarely, or temporary windows that I quickly close. When I need another permanent window, I'll put it on a new workspace.
I actively move workspaces up and down as I'm working on things to make what I need accessible in one motion.
For example, I usually frequently switch between the browser and whatever I'm doing, so I always move whatever I'm currently doing to right below the browser, so a single focus-workspace-up/down gets me where I want.
Floating Windows
Overview
Since: 25.01
Floating windows in niri always show on top of the tiled windows. The floating layout does not scroll. Each workspace/monitor has its own floating layout, just like each workspace/monitor has its own tiling layout.
New windows will automatically float if they have a parent (e.g. dialogs) or if they are fixed size (e.g. splash screens).
To change a window between floating and tiling, you can use the toggle-window-floating bind or right click while dragging/moving the window.
You can also use the open-floating true/false window rule to either force a window to open as floating, or to disable the automatic floating logic.
Use switch-focus-between-floating-and-tiling to switch the focus between the two layouts.
When focused on the floating layout, binds (like focus-column-right) will operate on the floating window.
You can precisely position a floating window with a command like niri msg action move-floating-window -x 100 -y 200.
Tabs
Overview
Since: 25.02
You can switch a column to present windows as tabs, rather than as vertical tiles. All tabs in a column have the same window size, so this is useful to get more vertical space.
Use this bind to toggle a column between normal and tabbed display:
binds {
   Mod+W { toggle-column-tabbed-display; }
}
All other binds remain the same: switch tabs with focus-window-down/up, add or remove windows with consume-window-into-column/expel-window-from-column, and so on.
Unlike regular columns, tabbed columns can go full-screen with multiple windows.
Tab indicator
Tabbed columns show a tab indicator on the side. You can click on the indicator to switch tabs.
See the tab-indicator section in the layout section to configure it.
By default, the indicator draws "outside" the column, so it can overlay other windows or go off-screen.
The place-within-column flag puts the indicator "inside" the column, adjusting the window size to make space for it.
This is especially useful for thicker tab indicators, or when you have very small gaps.
| Default | place-within-column |
|---|---|
Overview
Overview
Since: 25.05
The Overview is a zoomed-out view of your workspaces and windows. It lets you see what's going on at a glance, navigate, and drag windows around.
https://github.com/user-attachments/assets/379a5d1f-acdb-4c11-b36c-e85fd91f0995
Open it with the toggle-overview bind, via the top-left hot corner, or using a touchpad four-finger swipe up.
While in the overview, all keyboard shortcuts keep working, while pointing devices get easier:
- Mouse: left click and drag windows to move them, right click and drag to scroll workspaces left/right, scroll to switch workspaces (no holding Mod required).
- Touchpad: two-finger scrolling that matches the normal three-finger gestures.
- Touchscreen: one-finger scrolling, or one-finger long press to move a window.
tip
The overview needs to draw a background under every workspace. So, layer-shell surfaces work this way: the background and bottom layers zoom out together with the workspaces, while the top and overlay layers remain on top of the overview.
Put your bar on the top layer.
Drag-and-drop will scroll the workspaces up/down in the overview, and will activate a workspace when holding it for a moment. Combined with the hot corner, this lets you do a mouse-only DnD across workspaces.
https://github.com/user-attachments/assets/5f09c5b7-ff40-462b-8b9c-f1b8073a2cbb
You can also drag-and-drop a window to a new workspace above, below, or between existing workspaces.
https://github.com/user-attachments/assets/b76d5349-aa20-4889-ab90-0a51554c789d
Configuration
See the full documentation for the overview {} section here.
You can set the zoom-out level like this:
// Make workspaces four times smaller than normal in the overview.
overview {
    zoom 0.25
}
To change the color behind the workspaces, use the backdrop-color setting:
// Make the backdrop light.
overview {
    backdrop-color "#777777"
}
You can also disable the hot corner:
// Disable the hot corners.
gestures {
    hot-corners {
        off
    }
}
Backdrop customization
Apart from setting a custom backdrop color like described above, you can also put a layer-shell wallpaper into the backdrop with a layer rule, for example:
// Put swaybg inside the overview backdrop.
layer-rule {
    match namespace="^wallpaper$"
    place-within-backdrop true
}
This will only work for background layer surfaces that ignore exclusive zones (typical for wallpaper tools).
You can run two different wallpaper tools (like swaybg and swww), one for the backdrop and one for the normal workspace background. This way you could set the backdrop one to a blurred version of the wallpaper for a nice effect.
You can also combine this with a transparent background color if you don't like the wallpaper moving together with workspaces:
// Make the wallpaper stationary, rather than moving with workspaces.
layer-rule {
    // This is for swaybg; change for other wallpaper tools.
    // Find the right namespace by running niri msg layers.
    match namespace="^wallpaper$"
    place-within-backdrop true
}

// Set transparent workspace background color.
layout {
    background-color "transparent"
}

// Optionally, disable the workspace shadows in the overview.
overview {
    workspace-shadow {
        off
    }
}
Screencasting
Overview
The primary screencasting interface that niri offers is through portals and pipewire. It is supported by OBS, Firefox, Chromium, Electron, Telegram, and other apps. You can screencast both monitors and individual windows.
In order to use it, you need a working D-Bus session, pipewire, xdg-desktop-portal-gnome, and running niri as a session (i.e. through niri-session or from a display manager).
On widely used distros this should all "just work".
Alternatively, you can use tools that rely on the wlr-screencopy protocol, which niri also supports.
There are several features in niri designed for screencasting. Let's take a look!
Block out windows
You can block out specific windows from screencasts, replacing them with solid black rectangles. This can be useful for password managers or messenger windows, etc.
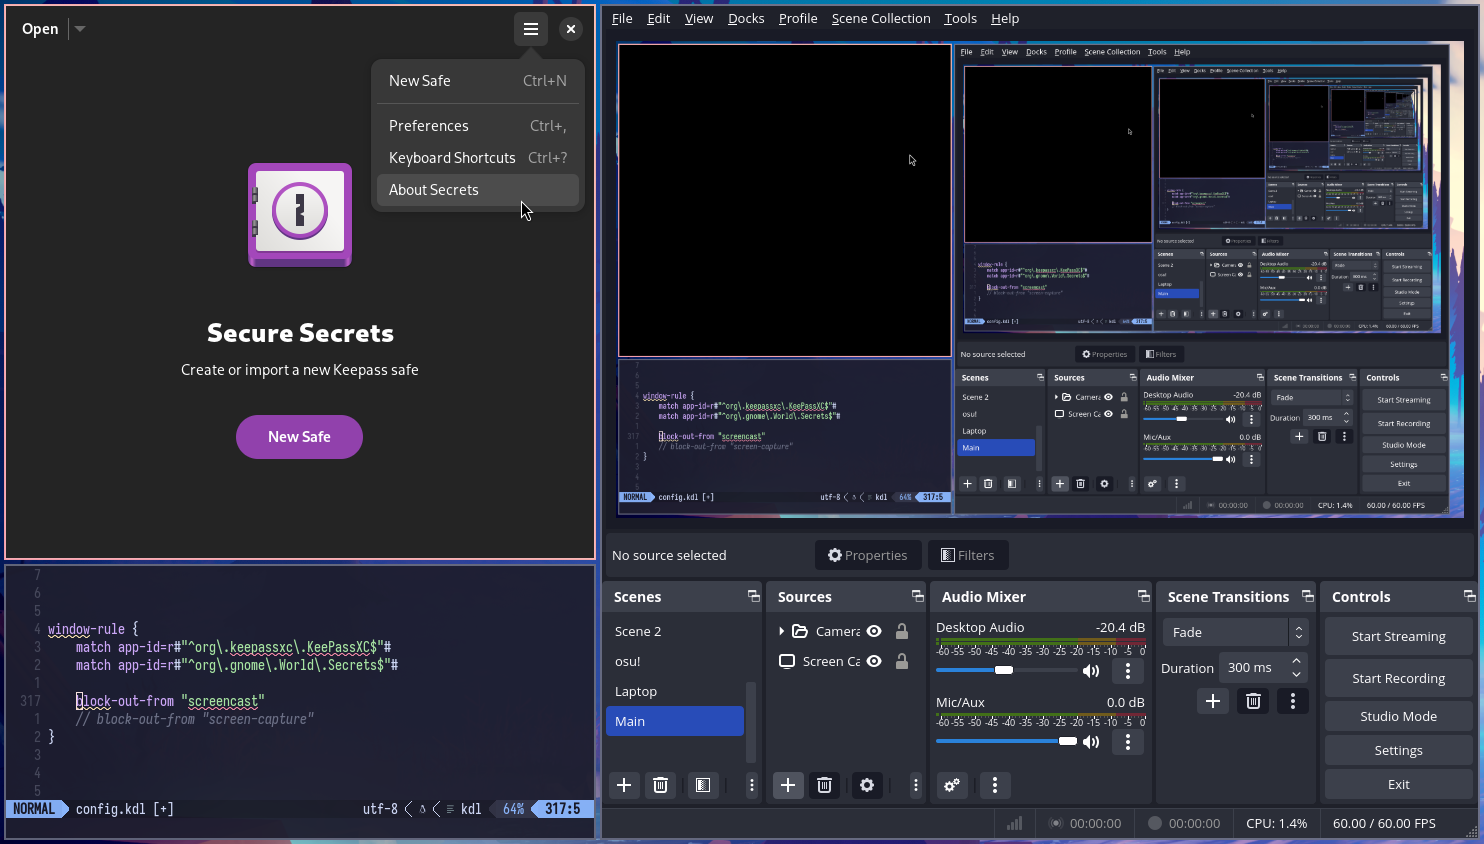
This is controlled through the block-out-from window rule, for example:
// Block out password managers from screencasts.
window-rule {
    match app-id=r#"^org\.keepassxc\.KeePassXC$"#
    match app-id=r#"^org\.gnome\.World\.Secrets$"#

    block-out-from "screencast"
}
You can similarly block out layer surfaces, using a layer rule:
// Block out mako notifications from screencasts.
layer-rule {
    match namespace="^notifications$"

    block-out-from "screencast"
}
Check the corresponding wiki section for more details and examples.
Dynamic screencast target
Since: 25.05
Niri provides a special screencast stream that you can change dynamically. It shows up as "niri Dynamic Cast Target" in the screencast window dialog.
When you select it, it will start as an empty, transparent video stream. Then, you can use the following binds to change what it shows:
set-dynamic-cast-windowto cast the focused window.set-dynamic-cast-monitorto cast the focused monitor.clear-dynamic-cast-targetto go back to an empty stream.
You can also use these actions from the command line, for example to interactively pick which window to cast:
$ niri msg action set-dynamic-cast-window --id $(niri msg --json pick-window | jq .id)
https://github.com/user-attachments/assets/c617a9d6-7d5e-4f1f-b8cc-9301182d9634
If the cast target disappears (e.g. the target window closes), the stream goes back to empty.
All dynamic casts share the same target, but new ones start out empty until the next time you change it (to avoid surprises and sharing something sensitive by mistake).
Indicate screencasted windows
Since: 25.02
The is-window-cast-target=true window rule matches windows targeted by an ongoing window screencast.
You use it with a special border color to clearly indicate screencasted windows.
This also works for windows targeted by dynamic screencasts. However, it will not work for windows that just happen to be visible in a full-monitor screencast.
// Indicate screencasted windows with red colors.
window-rule {
    match is-window-cast-target=true

    focus-ring {
        active-color "#f38ba8"
        inactive-color "#7d0d2d"
    }

    border {
        inactive-color "#7d0d2d"
    }

    shadow {
        color "#7d0d2d70"
    }

    tab-indicator {
        active-color "#f38ba8"
        inactive-color "#7d0d2d"
    }
}
Example:
Windowed (fake/detached) fullscreen
Since: 25.05
When screencasting browser-based presentations like Google Slides, you usually want to hide the browser UI, which requires making the browser fullscreen. This is not always convenient, for example if you have an ultrawide monitor, or just want to leave the browser as a smaller window, without taking up an entire monitor.
The toggle-windowed-fullscreen bind helps with this.
It tells the app that it went fullscreen, while in reality leaving it as a normal window that you can resize and put wherever you want.
binds {
    Mod+Ctrl+Shift+F { toggle-windowed-fullscreen; }
}
Keep in mind that not all apps react to fullscreening, so it may sometimes look as if the bind did nothing.
Here's an example showing a windowed-fullscreen Google Slides presentation, along with the presenter view and a meeting app:
Layer‐Shell Components
Things to keep in mind with layer-shell components (bars, launchers, etc.):
- When a full-screen window is active and covers the entire screen, it will render above the top layer, and it will be prioritized for keyboard focus. If your launcher uses the top layer, and you try to run it while looking at a full-screen window, it won't show up. Only the overlay layer will show up on top of full-screen windows.
- Components on the bottom and background layers will receive on-demand keyboard focus as expected. However, they will only receive exclusive keyboard focus when there are no windows on the workspace.
- When opening the Overview, components on the bottom and background layers will zoom out and remain on the workspaces, while the top and overlay layers remain on top of the Overview. So, if you want the bar to remain on top, put it on the top layer.
IPC, niri msg
You can communicate with the running niri instance over an IPC socket.
Check niri msg --help for available commands.
The --json flag prints the response in JSON, rather than formatted.
For example, niri msg --json outputs.
tip
If you're getting parsing errors from niri msg after upgrading niri, make sure that you've restarted niri itself.
You might be trying to run a newer niri msg against an older niri compositor.
Event Stream
Since: 0.1.9
While most niri IPC requests return a single response, the event stream request will make niri continuously stream events into the IPC connection until it is closed. This is useful for implementing various bars and indicators that update as soon as something happens, without continuous polling.
The event stream IPC is designed to give you the complete current state up-front, then follow up with updates to that state. This way, your state can never "desync" from niri, and you don't need to make any other IPC information requests.
Where reasonable, event stream state updates are atomic, though this is not always the case. For example, a window may end up with a workspace id for a workspace that had already been removed. This can happen if the corresponding workspaces-changed event arrives before the corresponding window-changed event.
To get a taste of the events, run niri msg event-stream.
Though, this is more of a debug function than anything.
You can get raw events from niri msg --json event-stream, or by connecting to the niri socket and requesting an event stream manually.
You can find the full list of events along with documentation here.
Programmatic Access
niri msg --json is a thin wrapper over writing and reading to a socket.
When implementing more complex scripts and modules, you're encouraged to access the socket directly.
Connect to the UNIX domain socket located at $NIRI_SOCKET in the filesystem.
Write your request encoded in JSON on a single line, followed by a newline character, or by flushing and shutting down the write end of the connection.
Read the reply as JSON, also on a single line.
You can use socat to test communicating with niri directly:
$ socat STDIO "$NIRI_SOCKET"
"FocusedWindow"
{"Ok":{"FocusedWindow":{"id":12,"title":"t socat STDIO /run/u ~","app_id":"Alacritty","workspace_id":6,"is_focused":true}}}
The reply is an Ok or an Err wrapping the same JSON object as you get from niri msg --json.
For more complex requests, you can use socat to find how niri msg formats them:
$ socat STDIO UNIX-LISTEN:temp.sock
# then, in a different terminal:
$ env NIRI_SOCKET=./temp.sock niri msg action focus-workspace 2
# then, look in the socat terminal:
{"Action":{"FocusWorkspace":{"reference":{"Index":2}}}}
You can find all available requests and response types in the niri-ipc sub-crate documentation.
Backwards Compatibility
The JSON output should remain stable, as in:
- existing fields and enum variants should not be renamed
- non-optional existing fields should not be removed
However, new fields and enum variants will be added, so you should handle unknown fields or variants gracefully where reasonable.
The formatted/human-readable output (i.e. without --json flag) is not considered stable.
Please prefer the JSON output for scripts, since I reserve the right to make any changes to the human-readable output.
The niri-ipc sub-crate (like other niri sub-crates) is not API-stable in terms of the Rust semver; rather, it follows the version of niri itself.
In particular, new struct fields and enum variants will be added.
Application-Specific Issues
Electron applications
Electron-based applications can run directly on Wayland, but it's not the default.
For Electron > 28, you can set an environment variable:
environment {
    ELECTRON_OZONE_PLATFORM_HINT "auto"
}
For previous versions, you need to pass command-line flags to the target application:
--enable-features=UseOzonePlatform --ozone-platform-hint=auto
If the application has a desktop entry, you can put the command-line arguments into the Exec section.
VSCode
If you're having issues with some VSCode hotkeys, try starting Xwayland and setting the DISPLAY=:0 environment variable for VSCode.
That is, still running VSCode with the Wayland backend, but with DISPLAY set to a running Xwayland instance.
Apparently, VSCode currently unconditionally queries the X server for a keymap.
WezTerm
note
Both of these issues seem to be fixed in the nightly build of WezTerm.
There's a bug in WezTerm that it waits for a zero-sized Wayland configure event, so its window never shows up in niri. To work around it, put this window rule in the niri config (included in the default config):
window-rule {
    match app-id=r#"^org\.wezfurlong\.wezterm$"#
    default-column-width {}
}
This empty default column width lets WezTerm pick its own initial width which makes it show up properly.
There's another bug in WezTerm that causes it to choose a wrong size when it's in a tiled state, and prevent resizing it.
Niri puts windows in the tiled state with prefer-no-csd.
So if you hit this problem, comment out prefer-no-csd in the niri config and restart WezTerm.
Ghidra
Some Java apps like Ghidra can show up blank under xwayland-satellite.
To fix this, run them with the _JAVA_AWT_WM_NONREPARENTING=1 environment variable.
rofi-wayland
There's a bug in rofi-wayland that prevents it from accepting keyboard input on niri with errors in the output. It's been fixed in rofi, but the fix had not been released yet.
Fullscreen games
Some video games, both Linux-native and on Wine, have various issues when using non-stacking desktop environments. Most of these can be avoided with Valve's gamescope, for example:
gamescope -f -w 1920 -h 1080 -W 1920 -H 1080 --force-grab-cursor --backend sdl -- <game>
This command will run --force-grab-cursor forces gamescope to use relative mouse movement which prevents the cursor from escaping the game's window on multi-monitor setups.
Note that --backend sdl is currently also required as gamescope's default Wayland backend doesn't lock the cursor properly (possibly related to https://github.com/ValveSoftware/gamescope/issues/1711).
Steam users should use gamescope through a game's launch options by replacing the game executable with %command%.
Other game launchers such as Lutris have their own ways of setting gamescope options.
Running X11-based games with this method doesn't require Xwayland as gamescope creates its own Xwayland server.
You can run Wayland-native games as well by passing --expose-wayland to gamescope, therefore eliminating X11 from the equation.
Steam
On some systems, Steam will show a fully black window. To fix this, navigate to Settings -> Interface (via Steam's tray icon, or by blindly finding the Steam menu at the top left of the window), then disable GPU accelerated rendering in web views. Restart Steam and it should now work fine.
If you do not want to disable GPU accelerated rendering you can instead try to pass the launch argument -system-composer instead.
Steam notifications don't run through the standard notification daemon and show up as floating windows in the center of the screen. You can move them to a more convenient location by adding a window rule in your niri config:
window-rule {
    match app-id="steam" title=r#"^notificationtoasts_\d+_desktop$"#
    default-floating-position x=10 y=10 relative-to="bottom-right"
}
Xwayland
X11 is very cursed, so built-in Xwayland support is not planned at the moment. However, there are multiple solutions to running X11 apps in niri.
Using xwayland-satellite
xwayland-satellite implements rootless Xwayland in a separate application, without the host compositor's involvement. It makes X11 windows appear as normal windows, just like a native Xwayland integration. xwayland-satellite works well with most applications: Steam, games, Discord, even more exotic things like Ardour with wine Windows VST plugins. However, X11 apps that want to position windows or bars at specific screen coordinates won't behave correctly.
note
In the next release, niri will have built-in xwayland-satellite integration. You can try it by installing git versions of both niri and xwayland-satellite. With no further configuration, niri will create X11 sockets, then when an X11 client connects, automatically start xwayland-satellite.
This matches how other compositors run Xwayland (but in niri's case, it's xwayland-satellite rather than Xwayland itself).
It also makes X11 apps work fine in spawn-at-startup and in XDG autostart.
Install it from your package manager, or build it according to instructions from its README, then run the xwayland-satellite binary.
Look for a log message like: Connected to Xwayland on :0.
Now you can start X11 applications on this X11 DISPLAY:
env DISPLAY=:0 flatpak run com.valvesoftware.Steam
You can also automatically run it at startup, and set DISPLAY by default for all apps by adding it to the environment section of the niri config:
spawn-at-startup "xwayland-satellite"
// Or, if you built it by hand:
// spawn-at-startup "~/path/to/code/target/release/xwayland-satellite"

environment {
    DISPLAY ":0"
}
note
If the :0 DISPLAY is already taken (for example, by some other Xwayland server like xwayland-run), xwayland-satellite will try the next DISPLAY numbers in order: :1, :2, etc. and tell you which one it used in its output.
Then, you will need to use that DISPLAY number for the env command or for the niri environment section.
You can also force a specific DISPLAY number like so: xwayland-satellite :12 will start on DISPLAY=:12.
Using the labwc Wayland compositor
Labwc is a traditional stacking Wayland compositor with Xwayland. You can run it as a window, then run X11 apps inside.
- Install labwc from your distribution packages.
- Run it inside niri with the
labwccommand. It will open as a new window. - Run an X11 application on the X11 DISPLAY that it provides, e.g.
env DISPLAY=:0 glxgears
Directly running Xwayland in rootful mode
This method involves invoking XWayland directly and running it as its own window, it also requires an extra X11 window manager running inside it.
Here's how you do it:
- Run
Xwayland(just the binary on its own without flags). This will spawn a black window which you can resize and fullscreen (with Mod+Shift+F) for convenience. On older Xwayland versions the window will be screen-sized and non-resizable. - Run some X11 window manager in there, e.g.
env DISPLAY=:0 i3. This way you can manage X11 windows inside the Xwayland instance. - Run an X11 application there, e.g.
env DISPLAY=:0 flatpak run com.valvesoftware.Steam.
With fullscreen game inside a fullscreen Xwayland you get pretty much a normal gaming experience.
tip
If you don't run an X11 window manager, Xwayland will close and re-open its window every time all X11 windows close and a new one opens. To prevent this, start an X11 WM inside as mentioned above, or open some other long-running X11 window.
One caveat is that currently rootful Xwayland doesn't seem to share clipboard with the compositor. For textual data you can do it manually using wl-clipboard, for example:
env DISPLAY=:0 xsel -ob | wl-copyto copy from Xwayland to niri clipboardwl-paste -n | env DISPLAY=:0 xsel -ibto copy from niri to Xwayland clipboard
You can also bind these to hotkeys if you want:
binds {
    Mod+Shift+C { spawn "sh" "-c" "env DISPLAY=:0 xsel -ob | wl-copy"; }
    Mod+Shift+V { spawn "sh" "-c" "wl-paste -n | env DISPLAY=:0 xsel -ib"; }
}
Using xwayland-run to run Xwayland
xwayland-run is a helper utility to run an X11 client within a dedicated Xwayland rootful server. It takes care of starting Xwayland, setting the X11 DISPLAY environment variable, setting up xauth and running the specified X11 client using the newly started Xwayland instance. When the X11 client terminates, xwayland-run will automatically close the dedicated Xwayland server.
It works like this:
xwayland-run <Xwayland arguments> -- your-x11-app <X11 app arguments>
For example:
xwayland-run -geometry 800x600 -fullscreen -- wine wingame.exe
Using the Cage Wayland compositor
It is also possible to run the X11 application in Cage, which runs a nested Wayland session which also supports Xwayland, where the X11 application can run in.
Compared to the Xwayland rootful method, this does not require running an extra X11 window manager, and can be used with one command cage -- /path/to/application. However, it can also cause issues if multiple windows are launched inside Cage, since Cage is meant to be used in kiosks, every new window will be automatically full-screened and take over the previously opened window.
To use Cage you need to:
- Install
cage, it should be in most repositories. - Run
cage -- /path/to/applicationand enjoy your X11 program on niri.
Optionally one can also modify the desktop entry for the application and add the cage -- prefix to the Exec property. The Spotify Flatpak for example would look something like this:
[Desktop Entry]
Type=Application
Name=Spotify
GenericName=Online music streaming service
Comment=Access all of your favorite music
Icon=com.spotify.Client
Exec=cage -- flatpak run com.spotify.Client
Terminal=false
Using gamescope
You can use gamescope to run X11 games and even Steam itself.
Similar to Cage, gamescope will only show a single, topmost window, so it's not very suitable to running regular apps. But you can run Steam in gamescope and then start some game from Steam just fine.
gamescope -- flatpak run com.valvesoftware.Steam
To run gamescope fullscreen, you can pass flags that set the necessary resolution, and a flag that starts it in fullscreen mode:
gamescope -W 2560 -H 1440 -w 2560 -h 1440 -f -- flatpak run com.valvesoftware.Steam
note
If Steam terminates abnormally while running in gamescope, it seems that subsequent gamescope invocations will sometimes fail to start it properly. If this happens, run Steam inside a rootful Xwayland as described above, then exit it normally, and then you will be able to use gamescope again.
Gestures
Overview
There are several gestures in niri.
Also see the gestures configuration wiki page.
Mouse
Interactive Move
Since: 0.1.10
You can move windows by holding Mod and the left mouse button.
You can customize the look of the window insertion preview in the insert-hint layout config.
Since: 25.01 Right click while moving to toggle between floating and tiling layout to put the window into.
Interactive Resize
Since: 0.1.6
You can resize windows by holding Mod and the right mouse button.
Reset Window Height
Since: 0.1.6
If you double-click on a top or bottom tiled window resize edge, the window height will reset to automatic.
This works with both window-initiated resizes (when using client-side decorations), and niri-initiated Mod + right click resizes.
Toggle Full Width
Since: 0.1.6
If you double-click on a left or right tiled window resize edge, the column will expand to the full workspace width.
This works with both window-initiated resizes (when using client-side decorations), and niri-initiated Mod + right click resizes.
Horizontal View Movement
Since: 0.1.6
Move the view horizontally by holding Mod and the middle mouse button (or the wheel) and dragging the mouse horizontally.
Workspace Switch
Since: 0.1.7
Switch workspaces by holding Mod and the middle mouse button (or the wheel) and dragging the mouse vertically.
Touchpad
Workspace Switch
Switch workspaces with three-finger vertical swipes.
Horizontal View Movement
Move the view horizontally with three-finger horizontal swipes.
All Pointing Devices
Drag-and-Drop Edge View Scroll
Since: 25.02
Scroll the tiling view when moving the mouse cursor against a monitor edge during drag-and-drop (DnD). Also works on a touchscreen.
Drag-and-Drop Edge Workspace Switch
Since: 25.05
Scroll the workspaces up/down when moving the mouse cursor against a monitor edge during drag-and-drop (DnD) while in the overview. Also works on a touchscreen.
Drag-and-Drop Hold to Activate
Since: 25.05
While drag-and-dropping, hold your mouse over a window to activate it. This will bring a floating window to the top for example.
In the overview, you can also hold the mouse over a workspace to switch to it.
Hot Corner to Toggle the Overview
Since: 25.05
Put your mouse at the very top-left corner of a monitor to toggle the overview. Also works during drag-and-dropping something.
Packaging niri
Overview
When building niri, check Cargo.toml for a list of build features.
For example, you can replace systemd integration with dinit integration using cargo build --release --no-default-features --features dinit,dbus,xdp-gnome-screencast.
The defaults however should work fine for most distributions.
warning
Do NOT build with --all-features!
Some features are meant only for development use. For example, one of the features enables collection of profiling data into a memory buffer that will grow indefinitely until you run out of memory.
The niri-visual-tests sub-crate/binary is development-only and should not be packaged.
The recommended way to package niri is so that it runs as a standalone desktop session. To do that, put files into the correct directories according to this table.
| File | Destination |
|---|---|
target/release/niri | /usr/bin/ |
resources/niri-session | /usr/bin/ |
resources/niri.desktop | /usr/share/wayland-sessions/ |
resources/niri-portals.conf | /usr/share/xdg-desktop-portal/ |
resources/niri.service (systemd) | /usr/lib/systemd/user/ |
resources/niri-shutdown.target (systemd) | /usr/lib/systemd/user/ |
resources/dinit/niri (dinit) | /usr/lib/dinit.d/user/ |
resources/dinit/niri-shutdown (dinit) | /usr/lib/dinit.d/user/ |
Doing this will make niri appear in GDM and other display managers.
Running tests
A bulk of our tests spawn niri compositor instances and test Wayland clients. This does not require a graphical session, however due to test parallelism, it can run into file descriptor limits on high core count systems.
If you run into this problem, you may need to limit not just the Rust test harness thread count, but also the Rayon thread count, since some niri tests use internal Rayon threading:
$ export RAYON_NUM_THREADS=2
...proceed to run cargo test, perhaps with --test-threads=2
Don't forget to exclude the development-only niri-visual-tests crate when running tests.
You may also want to set the RUN_SLOW_TESTS=1 environment variable to run the slower tests.
Version string
The niri version string includes its version and commit hash:
$ niri --version
niri 25.01 (e35c630)
When building in a packaging system, there's usually no repository, so the commit hash is unavailable and the version will show "unknown commit". In this case, please set the commit hash manually:
$ export NIRI_BUILD_COMMIT="e35c630"
...proceed to build niri
You can also override the version string entirely, in this case please make sure the corresponding niri version stays intact:
$ export NIRI_BUILD_VERSION_STRING="25.01-1 (e35c630)"
...proceed to build niri
Remember to set this variable for both cargo build and cargo install since the latter will rebuild niri if the environment changes.
Panics
Good panic backtraces are required for diagnosing niri crashes.
Please use the niri panic command to test that your package produces good backtraces.
$ niri panic
thread 'main' panicked at /builddir/build/BUILD/rust-1.83.0-build/rustc-1.83.0-src/library/core/src/time.rs:1142:31:
overflow when subtracting durations
stack backtrace:
   0: rust_begin_unwind
             at /builddir/build/BUILD/rust-1.83.0-build/rustc-1.83.0-src/library/std/src/panicking.rs:665:5
   1: core::panicking::panic_fmt
             at /builddir/build/BUILD/rust-1.83.0-build/rustc-1.83.0-src/library/core/src/panicking.rs:74:14
   2: core::panicking::panic_display
             at /builddir/build/BUILD/rust-1.83.0-build/rustc-1.83.0-src/library/core/src/panicking.rs:264:5
   3: core::option::expect_failed
             at /builddir/build/BUILD/rust-1.83.0-build/rustc-1.83.0-src/library/core/src/option.rs:2021:5
   4: expect<core::time::Duration>
             at /builddir/build/BUILD/rust-1.83.0-build/rustc-1.83.0-src/library/core/src/option.rs:933:21
   5: sub
             at /builddir/build/BUILD/rust-1.83.0-build/rustc-1.83.0-src/library/core/src/time.rs:1142:31
   6: cause_panic
             at /builddir/build/BUILD/niri-0.0.git.1699.279c8b6a-build/niri/src/utils/mod.rs:382:13
   7: main
             at /builddir/build/BUILD/niri-0.0.git.1699.279c8b6a-build/niri/src/main.rs:107:27
   8: call_once<fn() -> core::result::Result<(), alloc::boxed::Box<dyn core::error::Error, alloc::alloc::Global>>, ()>
             at /builddir/build/BUILD/rust-1.83.0-build/rustc-1.83.0-src/library/core/src/ops/function.rs:250:5
note: Some details are omitted, run with `RUST_BACKTRACE=full` for a verbose backtrace.
Important things to look for:
- The panic message is there: "overflow when subtracting durations".
- The backtrace goes all the way up to
mainand includescause_panic. - The backtrace includes the file and line number for
cause_panic:at /.../src/utils/mod.rs:382:13.
If possible, please ensure that your niri package on its own has good panics, i.e. without installing debuginfo or other packages. The user likely won't have debuginfo installed when their compositor first crashes, and we really want to be able to diagnose and fix all crashes right away.
Rust dependencies
Every niri release comes with a vendored dependencies archive from cargo vendor.
You can use it to build the corresponding niri release completely offline.
If you don't want to use vendored dependencies, consider following the niri release's Cargo.lock.
It contains the exact dependency versions that I used when testing the release.
If you need to change the versions of some dependencies, pay extra attention to smithay and smithay-drm-extras commit hash.
These crates don't currently have regular stable releases, so niri uses git snapshots.
Upstream frequently has breaking changes (API and behavior), so you're strongly advised to use the exact commit hash from the niri release's Cargo.lock.
FAQ
How to disable client-side decorations/make windows rectangular?
Uncomment the prefer-no-csd setting at the top level of the config, and then restart your apps.
Then niri will ask windows to omit client-side decorations, and also inform them that they are being tiled (which makes some windows rectangular, even if they cannot omit the decorations).
Note that currently this will prevent edge window resize handles from showing up. You can still resize windows by holding Mod and the right mouse button.
Why are transparent windows tinted? / Why is the border/focus ring showing up through semitransparent windows?
Uncomment the prefer-no-csd setting at the top level of the config, and then restart your apps.
Niri will draw focus rings and borders around windows that agree to omit their client-side decorations.
By default, focus ring and border are rendered as a solid background rectangle behind windows. That is, they will show up through semitransparent windows. This is because windows using client-side decorations can have an arbitrary shape.
You can also override this behavior with the draw-border-with-background window rule.
How to enable rounded corners for all windows?
Put this window rule in your config:
window-rule {
    geometry-corner-radius 12
    clip-to-geometry true
}
For more information, check the geometry-corner-radius window rule.
How to hide the "Important Hotkeys" pop-up at the start?
Put this into your config:
hotkey-overlay {
    skip-at-startup
}
How to run X11 apps like Steam or Discord?
To run X11 apps, you can use xwayland-satellite. Check the Xwayland wiki page for instructions.
Keep in mind that you can run many Electron apps such as VSCode natively on Wayland by passing the right flags, e.g. code --ozone-platform-hint=auto
Introduction
Loading
Niri will load configuration from $XDG_CONFIG_HOME/niri/config.kdl or ~/.config/niri/config.kdl, falling back to /etc/niri/config.kdl.
If both of these files are missing, niri will create $XDG_CONFIG_HOME/niri/config.kdl with the contents of the default configuration file, which are embedded into the niri binary at build time.
Please use the default configuration file as the starting point for your custom configuration.
The configuration is live-reloaded. Simply edit and save the config file, and your changes will be applied. This includes key bindings, output settings like mode, window rules, and everything else.
You can run niri validate to parse the config and see any errors.
To use a different config file path, pass it in the --config or -c argument to niri.
You can also set $NIRI_CONFIG to the path of the config file.
--config always takes precedence.
If --config or $NIRI_CONFIG doesn't point to a real file, the config will not be loaded.
If $NIRI_CONFIG is set to an empty string, it is ignored and the default config location is used instead.
Syntax
The config is written in KDL.
Comments
Lines starting with // are comments; they are ignored.
Also, you can put /- in front of a section to comment out the entire section:
/-output "eDP-1" {
    // Everything inside here is ignored.
    // The display won't be turned off
    // as the whole section is commented out.
    off
}
Flags
Toggle options in niri are commonly represented as flags. Writing out the flag enables it, and omitting it or commenting it out disables it. For example:
// "Focus follows mouse" is enabled.
input {
    focus-follows-mouse

    // Other settings...
}
// "Focus follows mouse" is disabled.
input {
    // focus-follows-mouse

    // Other settings...
}
Sections
Most sections cannot be repeated. For example:
// This is valid: every section appears once.
input {
    keyboard {
        // ...
    }

    touchpad {
        // ...
    }
}
// This is NOT valid: input section appears twice.
input {
    keyboard {
        // ...
    }
}

input {
    touchpad {
        // ...
    }
}
Exceptions are, for example, sections that configure different devices by name:
output "eDP-1" {
    // ...
}

// This is valid: this section configures a different output.
output "HDMI-A-1" {
    // ...
}

// This is NOT valid: "eDP-1" already appeared above.
// It will either throw a config parsing error, or otherwise not work.
output "eDP-1" {
    // ...
}
Defaults
Omitting most of the sections of the config file will leave you with the default values for that section.
A notable exception is binds {}: they do not get filled with defaults, so make sure you do not erase this section.
Breaking Change Policy
As a rule, niri updates should not break existing config files. (For example, the default config from niri v0.1.0 still parses fine on v25.02 as I'm writing this.)
Exceptions can be made for parsing bugs. For example, niri used to accept multiple binds to the same key, but this was not intended and did not do anything (the first bind was always used). A patch release changed niri from silently accepting this to causing a parsing failure. This is not a blanket rule, I will consider the potential impact of every breaking change like this before deciding to carry on with it.
Keep in mind that the breaking change policy applies only to niri releases. Commits between releases can and do occasionally break the config as new features are ironed out. However, I do try to limit these, since several people are running git builds.
Input
Overview
In this section you can configure input devices like keyboard and mouse, and some input-related options.
There's a section for each device type: keyboard, touchpad, mouse, trackpoint, tablet, touch.
Settings in those sections will apply to every device of that type.
Currently, there's no way to configure specific devices individually (but that is planned).
All settings at a glance:
input {
    keyboard {
        xkb {
            // layout "us"
            // variant "colemak_dh_ortho"
            // options "compose:ralt,ctrl:nocaps"
            // model ""
            // rules ""
            // file "~/.config/keymap.xkb"
        }

        // repeat-delay 600
        // repeat-rate 25
        // track-layout "global"
        numlock
    }

    touchpad {
        // off
        tap
        // dwt
        // dwtp
        // drag false
        // drag-lock
        natural-scroll
        // accel-speed 0.2
        // accel-profile "flat"
        // scroll-factor 1.0
        // scroll-method "two-finger"
        // scroll-button 273
        // scroll-button-lock
        // tap-button-map "left-middle-right"
        // click-method "clickfinger"
        // left-handed
        // disabled-on-external-mouse
        // middle-emulation
    }

    mouse {
        // off
        // natural-scroll
        // accel-speed 0.2
        // accel-profile "flat"
        // scroll-factor 1.0
        // scroll-method "no-scroll"
        // scroll-button 273
        // scroll-button-lock
        // left-handed
        // middle-emulation
    }

    trackpoint {
        // off
        // natural-scroll
        // accel-speed 0.2
        // accel-profile "flat"
        // scroll-method "on-button-down"
        // scroll-button 273
        // scroll-button-lock
        // left-handed
        // middle-emulation
    }

    trackball {
        // off
        // natural-scroll
        // accel-speed 0.2
        // accel-profile "flat"
        // scroll-method "on-button-down"
        // scroll-button 273
        // scroll-button-lock
        // left-handed
        // middle-emulation
    }

    tablet {
        // off
        map-to-output "eDP-1"
        // left-handed
        // calibration-matrix 1.0 0.0 0.0 0.0 1.0 0.0
    }

    touch {
        // off
        map-to-output "eDP-1"
    }

    // disable-power-key-handling
    // warp-mouse-to-focus
    // focus-follows-mouse max-scroll-amount="0%"
    // workspace-auto-back-and-forth

    // mod-key "Super"
    // mod-key-nested "Alt"
}
Keyboard
Layout
In the xkb section, you can set layout, variant, options, model and rules.
These are passed directly to libxkbcommon, which is also used by most other Wayland compositors.
See the xkeyboard-config(7) manual for more information.
input {
    keyboard {
        xkb {
            layout "us"
            variant "colemak_dh_ortho"
            options "compose:ralt,ctrl:nocaps"
        }
    }
}
tip
Since: 25.02
Alternatively, you can directly set a path to a .xkb file containing an xkb keymap. This overrides all other xkb settings.
input {
    keyboard {
        xkb {
            file "~/.config/keymap.xkb"
        }
    }
}
When using multiple layouts, niri can remember the current layout globally (the default) or per-window.
You can control this with the track-layout option.
global: layout change is global for all windows.window: layout is tracked for each window individually.
input {
    keyboard {
        track-layout "global"
    }
}
Repeat
Delay is in milliseconds before the keyboard repeat starts. Rate is in characters per second.
input {
    keyboard {
        repeat-delay 600
        repeat-rate 25
    }
}
Num Lock
Since: 25.05
Set the numlock flag to turn on Num Lock automatically at startup.
You might want to disable (comment out) numlock if you're using a laptop with a keyboard that overlays Num Lock keys on top of regular keys.
input {
    keyboard {
        numlock
    }
}
Pointing Devices
Most settings for the pointing devices are passed directly to libinput.
Other Wayland compositors also use libinput, so it's likely you will find the same settings there.
For flags like tap, omit them or comment them out to disable the setting.
A few settings are common between input devices:
off: if set, no events will be sent from this device.
A few settings are common between touchpad, mouse, trackpoint, and trackball:
natural-scroll: if set, inverts the scrolling direction.accel-speed: pointer acceleration speed, valid values are from-1.0to1.0where the default is0.0.accel-profile: can beadaptive(the default) orflat(disables pointer acceleration).scroll-method: when to generate scroll events instead of pointer motion events, can beno-scroll,two-finger,edge, oron-button-down. The default and supported methods vary depending on the device type.scroll-button: Since: 0.1.10 the button code used for theon-button-downscroll method. You can find it inlibinput debug-events.scroll-button-lock: Since: next release when enabled, the button does not need to be held down. Pressing once engages scrolling, pressing a second time disengages it, and double click acts as single click of the the underlying button.left-handed: if set, changes the device to left-handed mode.middle-emulation: emulate a middle mouse click by pressing left and right mouse buttons at once.
Settings specific to touchpads:
tap: tap-to-click.dwt: disable-when-typing.dwtp: disable-when-trackpointing.drag: Since: 25.05 can betrueorfalse, controls if tap-and-drag is enabled.drag-lock: Since: 25.02 if set, lifting the finger off for a short time while dragging will not drop the dragged item. See the libinput documentation.tap-button-map: can beleft-right-middleorleft-middle-right, controls which button corresponds to a two-finger tap and a three-finger tap.click-method: can bebutton-areasorclickfinger, changes the click method.disabled-on-external-mouse: do not send events while external pointer device is plugged in.
Settings specific to touchpad and mouse:
scroll-factor: Since: 0.1.10 scales the scrolling speed by this value.
Settings specific to tablets:
calibration-matrix: Since: 25.02 set to six floating point numbers to change the calibration matrix. See theLIBINPUT_CALIBRATION_MATRIXdocumentation for examples.
Tablets and touchscreens are absolute pointing devices that can be mapped to a specific output like so:
input {
    tablet {
        map-to-output "eDP-1"
    }

    touch {
        map-to-output "eDP-1"
    }
}
Valid output names are the same as the ones used for output configuration.
Since: 0.1.7 When a tablet is not mapped to any output, it will map to the union of all connected outputs, without aspect ratio correction.
General Settings
These settings are not specific to a particular input device.
disable-power-key-handling
By default, niri will take over the power button to make it sleep instead of power off.
Set this if you would like to configure the power button elsewhere (i.e. logind.conf).
input {
    disable-power-key-handling
}
warp-mouse-to-focus
Makes the mouse warp to newly focused windows.
Does not make the cursor visible if it had been hidden.
input {
    warp-mouse-to-focus
}
By default, the cursor warps separately horizontally and vertically. I.e. if moving the mouse only horizontally is enough to put it inside the newly focused window, then the mouse will move only horizontally, and not vertically.
Since: 25.05 You can customize this with the mode property.
mode="center-xy": warps by both X and Y coordinates together. So if the mouse was anywhere outside the newly focused window, it will warp to the center of the window.mode="center-xy-always": warps by both X and Y coordinates together, even if the mouse was already somewhere inside the newly focused window.
input {
    warp-mouse-to-focus mode="center-xy"
}
focus-follows-mouse
Focuses windows and outputs automatically when moving the mouse over them.
input {
    focus-follows-mouse
}
Since: 0.1.8 You can optionally set max-scroll-amount.
Then, focus-follows-mouse won't focus a window if it will result in the view scrolling more than the set amount.
The value is a percentage of the working area width.
input {
    // Allow focus-follows-mouse when it results in scrolling at most 10% of the screen.
    focus-follows-mouse max-scroll-amount="10%"
}
input {
    // Allow focus-follows-mouse only when it will not scroll the view.
    focus-follows-mouse max-scroll-amount="0%"
}
workspace-auto-back-and-forth
Normally, switching to the same workspace by index twice will do nothing (since you're already on that workspace). If this flag is enabled, switching to the same workspace by index twice will switch back to the previous workspace.
Niri will correctly switch to the workspace you came from, even if workspaces were reordered in the meantime.
input {
    workspace-auto-back-and-forth
}
mod-key, mod-key-nested
Since: 25.05
Customize the Mod key for key bindings.
Only valid modifiers are allowed, e.g. Super, Alt, Mod3, Mod5, Ctrl, Shift.
By default, Mod is equal to Super when running niri on a TTY, and to Alt when running niri as a nested winit window.
note
There are a lot of default bindings with Mod, none of them "make it through" to the underlying window.
You probably don't want to set mod-key to Ctrl or Shift, since Ctrl is commonly used for app hotkeys, and Shift is used for, well, regular typing.
// Switch the mod keys around: use Alt normally, and Super inside a nested window.
input {
    mod-key "Alt"
    mod-key-nested "Super"
}
Outputs
Overview
By default, niri will attempt to turn on all connected monitors using their preferred modes.
You can disable or adjust this with output sections.
Here's what it looks like with all properties written out:
output "eDP-1" {
    // off
    mode "1920x1080@120.030"
    scale 2.0
    transform "90"
    position x=1280 y=0
    variable-refresh-rate // on-demand=true
    focus-at-startup
    background-color "#003300"
    backdrop-color "#001100"
}

output "HDMI-A-1" {
    // ...settings for HDMI-A-1...
}

output "Some Company CoolMonitor 1234" {
    // ...settings for CoolMonitor...
}
Outputs are matched by connector name (i.e. eDP-1, HDMI-A-1), or by monitor manufacturer, model, and serial, separated by a single space each.
You can find all of these by running niri msg outputs.
Usually, the built-in monitor in laptops will be called eDP-1.
Since: 0.1.6 The output name is case-insensitive.
Since: 0.1.9 Outputs can be matched by manufacturer, model, and serial. Before, they could be matched only by the connector name.
off
This flag turns off that output entirely.
// Turn off that monitor.
output "HDMI-A-1" {
    off
}
mode
Set the monitor resolution and refresh rate.
The format is <width>x<height> or <width>x<height>@<refresh rate>.
If the refresh rate is omitted, niri will pick the highest refresh rate for the resolution.
If the mode is omitted altogether or doesn't work, niri will try to pick one automatically.
Run niri msg outputs while inside a niri instance to list all outputs and their modes.
The refresh rate that you set here must match exactly, down to the three decimal digits, to what you see in niri msg outputs.
// Set a high refresh rate for this monitor.
// High refresh rate monitors tend to use 60 Hz as their preferred mode,
// requiring a manual mode setting.
output "HDMI-A-1" {
    mode "2560x1440@143.912"
}

// Use a lower resolution on the built-in laptop monitor
// (for example, for testing purposes).
output "eDP-1" {
    mode "1280x720"
}
scale
Set the scale of the monitor.
Since: 0.1.6 If scale is unset, niri will guess an appropriate scale based on the physical dimensions and the resolution of the monitor.
Since: 0.1.7 You can use fractional scale values, for example scale 1.5 for 150% scale.
Since: 0.1.7 Dot is no longer needed for integer scale, for example you can write scale 2 instead of scale 2.0.
Since: 0.1.7 Scale below 0 and above 10 will now fail during config parsing. Scale was previously clamped to these values anyway.
output "eDP-1" {
    scale 2.0
}
transform
Rotate the output counter-clockwise.
Valid values are: "normal", "90", "180", "270", "flipped", "flipped-90", "flipped-180" and "flipped-270".
Values with flipped additionally flip the output.
output "HDMI-A-1" {
    transform "90"
}
position
Set the position of the output in the global coordinate space.
This affects directional monitor actions like focus-monitor-left, and cursor movement.
The cursor can only move between directly adjacent outputs.
note
Output scale and rotation has to be taken into account for positioning: outputs are sized in logical, or scaled, pixels. For example, a 3840×2160 output with scale 2.0 will have a logical size of 1920×1080, so to put another output directly adjacent to it on the right, set its x to 1920. If the position is unset or results in an overlap, the output is instead placed automatically.
output "HDMI-A-1" {
    position x=1280 y=0
}
Automatic Positioning
Niri repositions outputs from scratch every time the output configuration changes (which includes monitors disconnecting and connecting). The following algorithm is used for positioning outputs.
- Collect all connected monitors and their logical sizes.
- Sort them by their name. This makes it so the automatic positioning does not depend on the order the monitors are connected. This is important because the connection order is non-deterministic at compositor startup.
- Try to place every output with explicitly configured
position, in order. If the output overlaps previously placed outputs, place it to the right of all previously placed outputs. In this case, niri will also print a warning. - Place every output without explicitly configured
positionby putting it to the right of all previously placed outputs.
variable-refresh-rate
Since: 0.1.5
This flag enables variable refresh rate (VRR, also known as adaptive sync, FreeSync, or G-Sync), if the output supports it.
You can check whether an output supports VRR in niri msg outputs.
note
Some drivers have various issues with VRR.
If the cursor moves at a low framerate with VRR, try setting the disable-cursor-plane debug flag and reconnecting the monitor.
If a monitor is not detected as VRR-capable when it should, sometimes unplugging a different monitor fixes it.
Some monitors will continuously modeset (flash black) with VRR enabled; I'm not sure if there's a way to fix it.
output "HDMI-A-1" {
    variable-refresh-rate
}
Since: 0.1.9 You can also set the on-demand=true property, which will only enable VRR when this output shows a window matching the variable-refresh-rate window rule.
This is helpful to avoid various issues with VRR, since it can be disabled most of the time, and only enabled for specific windows, like games or video players.
output "HDMI-A-1" {
    variable-refresh-rate on-demand=true
}
focus-at-startup
Since: 25.05
Focus this output by default when niri starts.
If multiple outputs with focus-at-startup are connected, they are prioritized in the order that they appear in the config.
When none of the connected outputs are explicitly focus-at-startup, niri will focus the first one sorted by name (same output sorting as used elsewhere in niri).
// Focus HDMI-A-1 by default.
output "HDMI-A-1" {
    focus-at-startup
}

// ...if HDMI-A-1 wasn't connected, focus DP-2 instead.
output "DP-2" {
    focus-at-startup
}
background-color
Since: 0.1.8
Set the background color that niri draws for workspaces on this output. This is visible when you're not using any background tools like swaybg.
Until: 25.05 The alpha channel for this color will be ignored.
output "HDMI-A-1" {
    background-color "#003300"
}
backdrop-color
Since: 25.05
Set the backdrop color that niri draws for this output. This is visible between workspaces or in the overview.
The alpha channel for this color will be ignored.
output "HDMI-A-1" {
    backdrop-color "#001100"
}
Key Bindings
Overview
Key bindings are declared in the binds {} section of the config.
note
This is one of the few sections that does not get automatically filled with defaults if you omit it, so make sure to copy it from the default config.
Each bind is a hotkey followed by one action enclosed in curly brackets. For example:
binds {
    Mod+Left { focus-column-left; }
    Super+Alt+L { spawn "swaylock"; }
}
The hotkey consists of modifiers separated by + signs, followed by an XKB key name in the end.
Valid modifiers are:
CtrlorControl;Shift;Alt;SuperorWin;ISO_Level3_ShiftorMod5—this is the AltGr key on certain layouts;ISO_Level5_Shift: can be used with an xkb lv5 option likelv5:caps_switch;Mod.
Mod is a special modifier that is equal to Super when running niri on a TTY, and to Alt when running niri as a nested winit window.
This way, you can test niri in a window without causing too many conflicts with the host compositor's key bindings.
For this reason, most of the default keys use the Mod modifier.
Since: 25.05 You can customize the Mod key in the input section of the config.
tip
To find an XKB name for a particular key, you may use a program like wev.
Open it from a terminal and press the key that you want to detect. In the terminal, you will see output like this:
[14:     wl_keyboard] key: serial: 757775; time: 44940343; key: 113; state: 1 (pressed)
                      sym: Left         (65361), utf8: ''
[14:     wl_keyboard] key: serial: 757776; time: 44940432; key: 113; state: 0 (released)
                      sym: Left         (65361), utf8: ''
[14:     wl_keyboard] key: serial: 757777; time: 44940753; key: 114; state: 1 (pressed)
                      sym: Right        (65363), utf8: ''
[14:     wl_keyboard] key: serial: 757778; time: 44940846; key: 114; state: 0 (released)
                      sym: Right        (65363), utf8: ''
Here, look at sym: Left and sym: Right: these are the key names.
I was pressing the left and the right arrow in this example.
Keep in mind that binding shifted keys requires spelling out Shift and the unshifted version of the key, according to your XKB layout.
For example, on the US QWERTY layout, < is on Shift + ,, so to bind it, you spell out something like Mod+Shift+Comma.
As another example, if you've configured the French BÉPO XKB layout, your < is on AltGr + «.
AltGr is ISO_Level3_Shift, or equivalently Mod5, so to bind it, you spell out something like Mod+Mod5+guillemotleft.
When resolving latin keys, niri will search for the first configured XKB layout that has the latin key. So for example with US QWERTY and RU layouts configured, US QWERTY will be used for latin binds.
Since: 0.1.8 Binds will repeat by default (i.e. holding down a bind will make it trigger repeatedly).
You can disable that for specific binds with repeat=false:
binds {
    Mod+T repeat=false { spawn "alacritty"; }
}
Binds can also have a cooldown, which will rate-limit the bind and prevent it from repeatedly triggering too quickly.
binds {
    Mod+T cooldown-ms=500 { spawn "alacritty"; }
}
This is mostly useful for the scroll bindings.
Scroll Bindings
You can bind mouse wheel scroll ticks using the following syntax.
These binds will change direction based on the natural-scroll setting.
binds {
    Mod+WheelScrollDown cooldown-ms=150 { focus-workspace-down; }
    Mod+WheelScrollUp   cooldown-ms=150 { focus-workspace-up; }
    Mod+WheelScrollRight                { focus-column-right; }
    Mod+WheelScrollLeft                 { focus-column-left; }
}
Similarly, you can bind touchpad scroll "ticks". Touchpad scrolling is continuous, so for these binds it is split into discrete intervals based on distance travelled.
These binds are also affected by touchpad's natural-scroll, so these example binds are "inverted", since niri has natural-scroll enabled for touchpads by default.
binds {
    Mod+TouchpadScrollDown { spawn "wpctl" "set-volume" "@DEFAULT_AUDIO_SINK@" "0.02+"; }
    Mod+TouchpadScrollUp   { spawn "wpctl" "set-volume" "@DEFAULT_AUDIO_SINK@" "0.02-"; }
}
Both mouse wheel and touchpad scroll binds will prevent applications from receiving any scroll events when their modifiers are held down.
For example, if you have a Mod+WheelScrollDown bind, then while holding Mod, all mouse wheel scrolling will be consumed by niri.
Mouse Click Bindings
Since: 25.01
You can bind mouse clicks using the following syntax.
binds {
    Mod+MouseLeft    { close-window; }
    Mod+MouseRight   { close-window; }
    Mod+MouseMiddle  { close-window; }
    Mod+MouseForward { close-window; }
    Mod+MouseBack    { close-window; }
}
Mouse clicks operate on the window that was focused at the time of the click, not the window you're clicking.
Note that binding Mod+MouseLeft or Mod+MouseRight will override the corresponding gesture (moving or resizing the window).
Custom Hotkey Overlay Titles
Since: 25.02
The hotkey overlay (the Important Hotkeys dialog) shows a hardcoded list of binds.
You can customize this list using the hotkey-overlay-title property.
To add a bind to the hotkey overlay, set the property to the title that you want to show:
binds {
    Mod+Shift+S hotkey-overlay-title="Toggle Dark/Light Style" { spawn "some-script.sh"; }
}
Binds with custom titles are listed after the hardcoded binds and before non-customized Spawn binds.
To remove a hardcoded bind from the hotkey overlay, set the property to null:
binds {
    Mod+Q hotkey-overlay-title=null { close-window; }
}
tip
When multiple key combinations are bound to the same action:
- If any of the binds has a custom hotkey overlay title, niri will show that bind.
- Otherwise, if any of the binds has a null title, niri will hide the bind.
- Otherwise, niri will show the first key combination.
Custom titles support Pango markup:
binds {
    Mod+Shift+S hotkey-overlay-title="<b>Toggle</b> <span foreground='red'>Dark</span>/Light Style" { spawn "some-script.sh"; }
}
Actions
Every action that you can bind is also available for programmatic invocation via niri msg action.
Run niri msg action to get a full list of actions along with their short descriptions.
Here are a few actions that benefit from more explanation.
spawn
Run a program.
spawn accepts a path to the program binary as the first argument, followed by arguments to the program.
For example:
binds {
    // Run alacritty.
    Mod+T { spawn "alacritty"; }

    // Run `wpctl set-volume @DEFAULT_AUDIO_SINK@ 0.1+`.
    XF86AudioRaiseVolume { spawn "wpctl" "set-volume" "@DEFAULT_AUDIO_SINK@" "0.1+"; }
}
tip
Since: 0.1.5
Spawn bindings have a special allow-when-locked=true property that makes them work even while the session is locked:
binds {
    // This mute bind will work even when the session is locked.
    XF86AudioMute allow-when-locked=true { spawn "wpctl" "set-mute" "@DEFAULT_AUDIO_SINK@" "toggle"; }
}
Currently, niri does not use a shell to run commands, which means that you need to manually separate arguments.
binds {
    // Correct: every argument is in its own quotes.
    Mod+T { spawn "alacritty" "-e" "/usr/bin/fish"; }

    // Wrong: will interpret the whole `alacritty -e /usr/bin/fish` string as the binary path.
    Mod+D { spawn "alacritty -e /usr/bin/fish"; }

    // Wrong: will pass `-e /usr/bin/fish` as one argument, which alacritty won't understand.
    Mod+Q { spawn "alacritty" "-e /usr/bin/fish"; }
}
This also means that you cannot expand environment variables or ~.
If you need this, you can run the command through a shell manually.
binds {
    // Wrong: no shell expansion here. These strings will be passed literally to the program.
    Mod+T { spawn "grim" "-o" "$MAIN_OUTPUT" "~/screenshot.png"; }

    // Correct: run this through a shell manually so that it can expand the arguments.
    // Note that the entire command is passed as a SINGLE argument,
    // because shell will do its own argument splitting by whitespace.
    Mod+D { spawn "sh" "-c" "grim -o $MAIN_OUTPUT ~/screenshot.png"; }

    // You can also use a shell to run multiple commands,
    // use pipes, process substitution, and so on.
    Mod+Q { spawn "sh" "-c" "notify-send clipboard \"$(wl-paste)\""; }
}
As a special case, niri will expand ~ to the home directory only at the beginning of the program name.
binds {
    // This will work: one ~ at the very beginning.
    Mod+T { spawn "~/scripts/do-something.sh"; }
}
quit
Exit niri after showing a confirmation dialog to avoid accidentally triggering it.
binds {
    Mod+Shift+E { quit; }
}
If you want to skip the confirmation dialog, set the flag like so:
binds {
    Mod+Shift+E { quit skip-confirmation=true; }
}
do-screen-transition
Since: 0.1.6
Freeze the screen for a brief moment then crossfade to the new contents.
binds {
    Mod+Return { do-screen-transition; }
}
This action is mainly useful to trigger from scripts changing the system theme or style (between light and dark for example). It makes transitions like this, where windows change their style one by one, look smooth and synchronized.
For example, using the GNOME color scheme setting:
niri msg action do-screen-transition
dconf write /org/gnome/desktop/interface/color-scheme "\"prefer-dark\""
By default, the screen is frozen for 250 ms to give windows time to redraw, before the crossfade. You can set this delay like this:
binds {
    Mod+Return { do-screen-transition delay-ms=100; }
}
Or, in scripts:
niri msg action do-screen-transition --delay-ms 100
toggle-window-rule-opacity
Since: 25.02
Toggle the opacity window rule of the focused window. This only has an effect if the window's opacity window rule is already set to semitransparent.
binds {
    Mod+O { toggle-window-rule-opacity; }
}
screenshot, screenshot-screen, screenshot-window
Actions for taking screenshots.
screenshot: opens the built-in interactive screenshot UI.screenshot-screen,screenshow-window: takes a screenshot of the focused screen or window respectively.
The screenshot is both stored to the clipboard and saved to disk, according to the screenshot-path option.
Since: 25.02 You can disable saving to disk for a specific bind with the write-to-disk=false property:
binds {
    Ctrl+Print { screenshot-screen write-to-disk=false; }
    Alt+Print { screenshot-window write-to-disk=false; }
}
In the interactive screenshot UI, pressing CtrlC will copy the screenshot to the clipboard without writing it to disk.
Since: 25.05 You can hide the mouse pointer in screenshots with the show-pointer=false property:
binds {
    // The pointer will be hidden by default
    // (you can still show it by pressing P).
    Print { screenshot show-pointer=false; }

    // The pointer will be hidden on the screenshot.
    Ctrl+Print { screenshot-screen show-pointer=false; }
}
toggle-keyboard-shortcuts-inhibit
Since: 25.02
Applications such as remote-desktop clients and software KVM switches may request that niri stops processing its keyboard shortcuts so that they may, for example, forward the key presses as-is to a remote machine.
toggle-keyboard-shortcuts-inhibit is an escape hatch that toggles the inhibitor.
It's a good idea to bind it, so a buggy application can't hold your session hostage.
binds {
    Mod+Escape { toggle-keyboard-shortcuts-inhibit; }
}
You can also make certain binds ignore inhibiting with the allow-inhibiting=false property.
They will always be handled by niri and never passed to the window.
binds {
    // This bind will always work, even when using a virtual machine.
    Super+Alt+L allow-inhibiting=false { spawn "swaylock"; }
}
Switch Events
Overview
Since: 0.1.10
Switch event bindings are declared in the switch-events {} section of the config.
Here are all the events that you can bind at a glance:
switch-events {
    lid-close { spawn "notify-send" "The laptop lid is closed!"; }
    lid-open { spawn "notify-send" "The laptop lid is open!"; }
    tablet-mode-on { spawn "bash" "-c" "gsettings set org.gnome.desktop.a11y.applications screen-keyboard-enabled true"; }
    tablet-mode-off { spawn "bash" "-c" "gsettings set org.gnome.desktop.a11y.applications screen-keyboard-enabled false"; }
}
The syntax is similar to key bindings.
Currently, only the spawn action are supported.
note
In contrast to key bindings, switch event bindings are always executed, even when the session is locked.
lid-close, lid-open
These events correspond to closing and opening of the laptop lid.
Note that niri will already automatically turn the internal laptop monitor on and off in accordance with the laptop lid.
switch-events {
    lid-close { spawn "notify-send" "The laptop lid is closed!"; }
    lid-open { spawn "notify-send" "The laptop lid is open!"; }
}
tablet-mode-on, tablet-mode-off
These events trigger when a convertible laptop goes into or out of tablet mode. In tablet mode, the keyboard and mouse are usually inaccessible, so you can use these events to activate the on-screen keyboard.
switch-events {
    tablet-mode-on { spawn "bash" "-c" "gsettings set org.gnome.desktop.a11y.applications screen-keyboard-enabled true"; }
    tablet-mode-off { spawn "bash" "-c" "gsettings set org.gnome.desktop.a11y.applications screen-keyboard-enabled false"; }
}
Layout
Overview
In the layout {} section you can change various settings that influence how windows are positioned and sized.
Here are the contents of this section at a glance:
layout {
    gaps 16
    center-focused-column "never"
    always-center-single-column
    empty-workspace-above-first
    default-column-display "tabbed"
    background-color "#003300"

    preset-column-widths {
        proportion 0.33333
        proportion 0.5
        proportion 0.66667
    }

    default-column-width { proportion 0.5; }

    preset-window-heights {
        proportion 0.33333
        proportion 0.5
        proportion 0.66667
    }

    focus-ring {
        // off
        width 4
        active-color "#7fc8ff"
        inactive-color "#505050"
        urgent-color "#9b0000"
        // active-gradient from="#80c8ff" to="#bbddff" angle=45
        // inactive-gradient from="#505050" to="#808080" angle=45 relative-to="workspace-view"
        // urgent-gradient from="#800" to="#a33" angle=45
    }

    border {
        off
        width 4
        active-color "#ffc87f"
        inactive-color "#505050"
        urgent-color "#9b0000"
        // active-gradient from="#ffbb66" to="#ffc880" angle=45 relative-to="workspace-view"
        // inactive-gradient from="#505050" to="#808080" angle=45 relative-to="workspace-view" in="srgb-linear"
        // urgent-gradient from="#800" to="#a33" angle=45
    }

    shadow {
        // on
        softness 30
        spread 5
        offset x=0 y=5
        draw-behind-window true
        color "#00000070"
        // inactive-color "#00000054"
    }

    tab-indicator {
        // off
        hide-when-single-tab
        place-within-column
        gap 5
        width 4
        length total-proportion=1.0
        position "right"
        gaps-between-tabs 2
        corner-radius 8
        active-color "red"
        inactive-color "gray"
        urgent-color "blue"
        // active-gradient from="#80c8ff" to="#bbddff" angle=45
        // inactive-gradient from="#505050" to="#808080" angle=45 relative-to="workspace-view"
        // urgent-gradient from="#800" to="#a33" angle=45
    }

    insert-hint {
        // off
        color "#ffc87f80"
        // gradient from="#ffbb6680" to="#ffc88080" angle=45 relative-to="workspace-view"
    }

    struts {
        // left 64
        // right 64
        // top 64
        // bottom 64
    }
}
gaps
Set gaps around (inside and outside) windows in logical pixels.
Since: 0.1.7 You can use fractional values.
The value will be rounded to physical pixels according to the scale factor of every output.
For example, gaps 0.5 on an output with scale 2 will result in one physical-pixel wide gaps.
Since: 0.1.8 You can emulate "inner" vs. "outer" gaps with negative struts values (see the struts section below).
layout {
    gaps 16
}
center-focused-column
When to center a column when changing focus. This can be set to:
"never": no special centering, focusing an off-screen column will scroll it to the left or right edge of the screen. This is the default."always", the focused column will always be centered."on-overflow", focusing a column will center it if it doesn't fit on screen together with the previously focused column.
layout {
    center-focused-column "always"
}
always-center-single-column
Since: 0.1.9
If set, niri will always center a single column on a workspace, regardless of the center-focused-column option.
layout {
    always-center-single-column
}
empty-workspace-above-first
Since: 25.01
If set, niri will always add an empty workspace at the very start, in addition to the empty workspace at the very end.
layout {
    empty-workspace-above-first
}
default-column-display
Since: 25.02
Sets the default display mode for new columns.
Can be normal or tabbed.
// Make all new columns tabbed by default.
layout {
    default-column-display "tabbed"

    // You may also want to hide the tab indicator
    // when there's only a single window in a column.
    tab-indicator {
        hide-when-single-tab
    }
}
preset-column-widths
Set the widths that the switch-preset-column-width action (Mod+R) toggles between.
proportion sets the width as a fraction of the output width, taking gaps into account.
For example, you can perfectly fit four windows sized proportion 0.25 on an output, regardless of the gaps setting.
The default preset widths are 1⁄3, 1⁄2 and 2⁄3 of the output.
fixed sets the window width in logical pixels exactly.
layout {
    // Cycle between 1/3, 1/2, 2/3 of the output, and a fixed 1280 logical pixels.
    preset-column-widths {
        proportion 0.33333
        proportion 0.5
        proportion 0.66667
        fixed 1280
    }
}
default-column-width
Set the default width of the new windows.
The syntax is the same as in preset-column-widths above.
layout {
    // Open new windows sized 1/3 of the output.
    default-column-width { proportion 0.33333; }
}
You can also leave the brackets empty, then the windows themselves will decide their initial width.
layout {
    // New windows decide their initial width themselves.
    default-column-width {}
}
note
default-column-width {} causes niri to send a (0, H) size in the initial configure request.
This is a bit unclearly defined in the Wayland protocol, so some clients may misinterpret it.
Either way, default-column-width {} is most useful for specific windows, in form of a window rule with the same syntax.
preset-window-heights
Since: 0.1.9
Set the heights that the switch-preset-window-height action (Mod+Shift+R) toggles between.
proportion sets the height as a fraction of the output height, taking gaps into account.
The default preset heights are 1⁄3, 1⁄2 and 2⁄3 of the output.
fixed sets the height in logical pixels exactly.
layout {
    // Cycle between 1/3, 1/2, 2/3 of the output, and a fixed 720 logical pixels.
    preset-window-heights {
        proportion 0.33333
        proportion 0.5
        proportion 0.66667
        fixed 720
    }
}
focus-ring and border
Focus ring and border are drawn around windows and indicate the active window. They are very similar and have the same options.
The difference is that the focus ring is drawn only around the active window, whereas borders are drawn around all windows and affect their sizes (windows shrink to make space for the borders).
| Focus Ring | Border |
|---|---|
 | 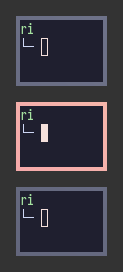 |
tip
By default, focus ring and border are rendered as a solid background rectangle behind windows. That is, they will show up through semitransparent windows. This is because windows using client-side decorations can have an arbitrary shape.
If you don't like that, you should uncomment the prefer-no-csd setting at the top level of the config.
Niri will draw focus rings and borders around windows that agree to omit their client-side decorations.
Alternatively, you can override this behavior with the draw-border-with-background window rule.
Focus ring and border have the following options.
layout {
    // focus-ring has the same options.
    border {
        // Uncomment this line to disable the border.
        // off

        // Width of the border in logical pixels.
        width 4

        active-color "#ffc87f"
        inactive-color "#505050"

        // Color of the border around windows that request your attention.
        urgent-color "#9b0000"

        // active-gradient from="#ffbb66" to="#ffc880" angle=45 relative-to="workspace-view"
        // inactive-gradient from="#505050" to="#808080" angle=45 relative-to="workspace-view" in="srgb-linear"
    }
}
Width
Set the thickness of the border in logical pixels.
Since: 0.1.7 You can use fractional values.
The value will be rounded to physical pixels according to the scale factor of every output.
For example, width 0.5 on an output with scale 2 will result in one physical-pixel thick borders.
layout {
    border {
        width 2
    }
}
Colors
Colors can be set in a variety of ways:
- CSS named colors:
"red" - RGB hex:
"#rgb","#rgba","#rrggbb","#rrggbbaa" - CSS-like notation:
"rgb(255, 127, 0)","rgba()","hsl()"and a few others.
active-color is the color of the focus ring / border around the active window, and inactive-color is the color of the focus ring / border around all other windows.
The focus ring is only drawn around the active window on each monitor, so with a single monitor you will never see its inactive-color.
You will see it if you have multiple monitors, though.
There's also a deprecated syntax for setting colors with four numbers representing R, G, B and A: active-color 127 200 255 255.
Gradients
Similarly to colors, you can set active-gradient and inactive-gradient, which will take precedence.
Gradients are rendered the same as CSS linear-gradient(angle, from, to).
The angle works the same as in linear-gradient, and is optional, defaulting to 180 (top-to-bottom gradient).
You can use any CSS linear-gradient tool on the web to set these up, like css-gradient.com.
layout {
    focus-ring {
        active-gradient from="#80c8ff" to="#bbddff" angle=45
    }
}
Gradients can be colored relative to windows individually (the default), or to the whole view of the workspace.
To do that, set relative-to="workspace-view".
Here's a visual example:
| Default | relative-to="workspace-view" |
|---|---|
 |  |
layout {
    border {
        active-gradient from="#ffbb66" to="#ffc880" angle=45 relative-to="workspace-view"
        inactive-gradient from="#505050" to="#808080" angle=45 relative-to="workspace-view"
    }
}
Since: 0.1.8 You can set the gradient interpolation color space using syntax like in="srgb-linear" or in="oklch longer hue".
Supported color spaces are:
srgb(the default),srgb-linear,oklab,oklchwithshorter hueorlonger hueorincreasing hueordecreasing hue.
They are rendered the same as CSS.
For example, active-gradient from="#f00f" to="#0f05" angle=45 in="oklch longer hue" will look the same as CSS linear-gradient(45deg in oklch longer hue, #f00f, #0f05).
layout {
    border {
        active-gradient from="#f00f" to="#0f05" angle=45 in="oklch longer hue"
    }
}
shadow
Since: 25.02
Shadow rendered behind a window.
Set on to enable the shadow.
softness controls the shadow softness/size in logical pixels, same as CSS box-shadow blur radius.
Setting softness 0 will give you hard shadows.
spread is the distance to expand the window rectangle in logical pixels, same as CSS box-shadow spread.
Since: 25.05 Spread can be negative.
offset moves the shadow relative to the window in logical pixels, same as CSS box-shadow offset.
For example, offset x=2 y=2 will move the shadow 2 logical pixels downwards and to the right.
Set draw-behind-window to true to make shadows draw behind the window rather than just around it.
Note that niri has no way of knowing about the CSD window corner radius.
It has to assume that windows have square corners, leading to shadow artifacts inside the CSD rounded corners.
This setting fixes those artifacts.
However, instead you may want to set prefer-no-csd and/or geometry-corner-radius.
Then, niri will know the corner radius and draw the shadow correctly, without having to draw it behind the window.
These will also remove client-side shadows if the window draws any.
color is the shadow color and opacity.
inactive-color lets you override the shadow color for inactive windows; by default, a more transparent color is used.
Shadow drawing will follow the window corner radius set with the geometry-corner-radius window rule.
note
Currently, shadow drawing only supports matching radius for all corners. If you set geometry-corner-radius to four values instead of one, the first (top-left) corner radius will be used for shadows.
// Enable shadows.
layout {
    shadow {
        on
    }
}

// Also ask windows to omit client-side decorations, so that
// they don't draw their own window shadows.
prefer-no-csd
tab-indicator
Since: 25.02
Controls the appearance of the tab indicator that appears next to columns in tabbed display mode.
Set off to hide the tab indicator.
Set hide-when-single-tab to hide the indicator for tabbed columns that only have a single window.
Set place-within-column to put the tab indicator "within" the column, rather than outside.
This will include it in column sizing and avoid overlaying adjacent columns.
gap sets the gap between the tab indicator and the window in logical pixels.
The gap can be negative, this will put the tab indicator on top of the window.
width sets the thickness of the indicator in logical pixels.
length controls the length of the indicator.
Set the total-proportion property to make tabs take up this much length relative to the window size.
By default, the tab indicator has length equal to half of the window size, or length total-proportion=0.5.
position sets the position of the tab indicator relative to the window.
It can be left, right, top, or bottom.
gaps-between-tabs controls the gap between individual tabs in logical pixels.
corner-radius sets the rounded corner radius for tabs in the indicator in logical pixels.
When gaps-between-tabs is zero, only the first and the last tabs have rounded corners, otherwise all tabs do.
active-color, inactive-color, urgent-color, active-gradient, inactive-gradient, urgent-gradient let you override the colors for the tabs.
They have the same semantics as the border and focus ring colors and gradients.
Tab colors are picked in this order:
- Colors from the
tab-indicatorwindow rule, if set. - Colors from the
tab-indicatorlayout options, if set (you're here). - If neither are set, niri picks the color matching the window border or focus ring, whichever one is active.
// Make the tab indicator wider and match the window height,
// also put it at the top and within the column.
layout {
    tab-indicator {
        width 8
        gap 8
        length total-proportion=1.0
        position "top"
        place-within-column
    }
}
insert-hint
Since: 0.1.10
Settings for the window insert position hint during an interactive window move.
off disables the insert hint altogether.
color and gradient let you change the color of the hint and have the same syntax as colors and gradients in border and focus ring.
layout {
    insert-hint {
        // off
        color "#ffc87f80"
        gradient from="#ffbb6680" to="#ffc88080" angle=45 relative-to="workspace-view"
    }
}
struts
Struts shrink the area occupied by windows, similarly to layer-shell panels. You can think of them as a kind of outer gaps. They are set in logical pixels.
Left and right struts will cause the next window to the side to always peek out slightly. Top and bottom struts will simply add outer gaps in addition to the area occupied by layer-shell panels and regular gaps.
Since: 0.1.7 You can use fractional values.
The value will be rounded to physical pixels according to the scale factor of every output.
For example, top 0.5 on an output with scale 2 will result in one physical-pixel wide top strut.
layout {
    struts {
        left 64
        right 64
        top 64
        bottom 64
    }
}
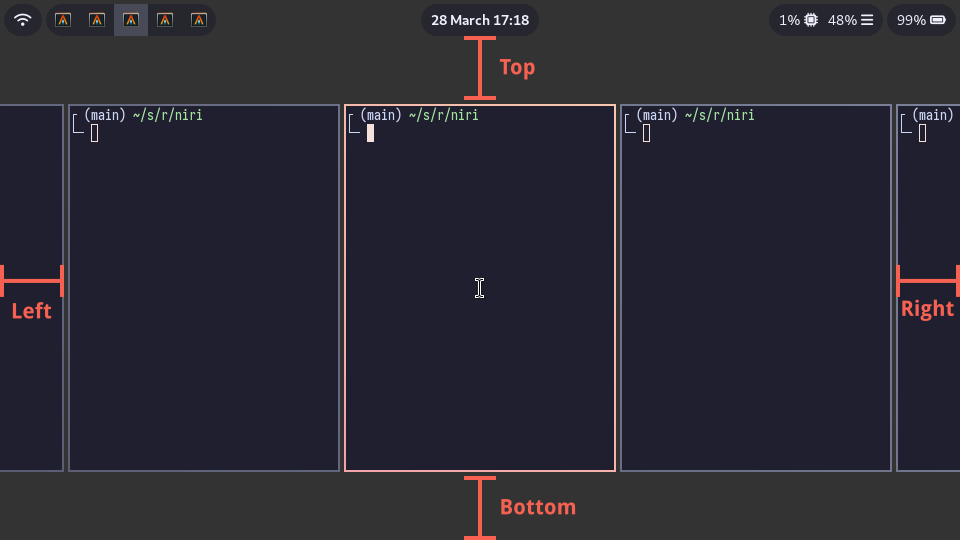
Since: 0.1.8 You can use negative values. They will push the windows outwards, even outside the edges of the screen.
You can use negative struts with matching gaps value to emulate "inner" vs. "outer" gaps. For example, use this for inner gaps without outer gaps:
layout {
    gaps 16

    struts {
        left -16
        right -16
        top -16
        bottom -16
    }
}
background-color
Since: 25.05
Set the default background color that niri draws for workspaces. This is visible when you're not using any background tools like swaybg.
layout {
    background-color "#003300"
}
You can also set the color per-output in the output config.
Named Workspaces
Overview
Since: 0.1.6
You can declare named workspaces at the top level of the config:
workspace "browser"

workspace "chat" {
    open-on-output "Some Company CoolMonitor 1234"
}
Contrary to normal dynamic workspaces, named workspaces always exist, even when they have no windows. Otherwise, they behave like any other workspace: you can move them around, move to a different monitor, and so on.
Actions like focus-workspace or move-column-to-workspace can refer to workspaces by name.
Also, you can use an open-on-workspace window rule to make a window open on a specific named workspace:
// Declare a workspace named "chat" that opens on the "DP-2" output.
workspace "chat" {
    open-on-output "DP-2"
}

// Open Fractal on the "chat" workspace, if it runs at niri startup.
window-rule {
    match at-startup=true app-id=r#"^org\.gnome\.Fractal$"#
    open-on-workspace "chat"
}
Named workspaces initially appear in the order they are declared in the config file. When editing the config while niri is running, newly declared named workspaces will appear at the very top of a monitor.
If you delete some named workspace from the config, the workspace will become normal (unnamed), and if there are no windows on it, it will be removed (as any other normal workspace). There's no way to give a name to an already existing workspace, but you can simply move windows that you want to a new, empty named workspace.
Since: 0.1.9 open-on-output can now use monitor manufacturer, model, and serial.
Before, it could only use the connector name.
Since: 25.01 You can use set-workspace-name and unset-workspace-name actions to change workspace names dynamically.
Since: 25.02 Named workspaces no longer update/forget their original output when opening a new window on them (unnamed workspaces will keep doing that). This means that named workspaces "stick" to their original output in more cases, reflecting their more permanent nature. Explicitly moving a named workspace to a different monitor will still update its original output.
Miscellaneous
This page documents all top-level options that don't otherwise have dedicated pages.
Here are all of these options at a glance:
spawn-at-startup "waybar"
spawn-at-startup "alacritty"

prefer-no-csd

screenshot-path "~/Pictures/Screenshots/Screenshot from %Y-%m-%d %H-%M-%S.png"

environment {
    QT_QPA_PLATFORM "wayland"
    DISPLAY null
}

cursor {
    xcursor-theme "breeze_cursors"
    xcursor-size 48

    hide-when-typing
    hide-after-inactive-ms 1000
}

overview {
    zoom 0.5
    backdrop-color "#262626"

    workspace-shadow {
        // off
        softness 40
        spread 10
        offset x=0 y=10
        color "#00000050"
    }
}

xwayland-satellite {
    // off
    path "xwayland-satellite"
}

clipboard {
    disable-primary
}

hotkey-overlay {
    skip-at-startup
    hide-not-bound
}
spawn-at-startup
Add lines like this to spawn processes at niri startup.
spawn-at-startup accepts a path to the program binary as the first argument, followed by arguments to the program.
This option works the same way as the spawn key binding action, so please read about all its subtleties there.
spawn-at-startup "waybar"
spawn-at-startup "alacritty"
Note that running niri as a systemd session supports xdg-desktop-autostart out of the box, which may be more convenient to use.
Thanks to this, apps that you configured to autostart in GNOME will also "just work" in niri, without any manual spawn-at-startup configuration.
prefer-no-csd
This flag will make niri ask the applications to omit their client-side decorations.
If an application will specifically ask for CSD, the request will be honored. Additionally, clients will be informed that they are tiled, removing some rounded corners.
With prefer-no-csd set, applications that negotiate server-side decorations through the xdg-decoration protocol will have focus ring and border drawn around them without a solid colored background.
note
Unlike most other options, changing prefer-no-csd will not entirely affect already running applications.
It will make some windows rectangular, but won't remove the title bars.
This mainly has to do with niri working around a bug in SDL2 that prevents SDL2 applications from starting.
Restart applications after changing prefer-no-csd in the config to fully apply it.
prefer-no-csd
screenshot-path
Set the path where screenshots are saved.
A ~ at the front will be expanded to the home directory.
The path is formatted with strftime(3) to give you the screenshot date and time.
Niri will create the last folder of the path if it doesn't exist.
screenshot-path "~/Pictures/Screenshots/Screenshot from %Y-%m-%d %H-%M-%S.png"
You can also set this option to null to disable saving screenshots to disk.
screenshot-path null
environment
Override environment variables for processes spawned by niri.
environment {
    // Set a variable like this:
    // QT_QPA_PLATFORM "wayland"

    // Remove a variable by using null as the value:
    // DISPLAY null
}
cursor
Change the theme and size of the cursor as well as set the XCURSOR_THEME and XCURSOR_SIZE environment variables.
cursor {
    xcursor-theme "breeze_cursors"
    xcursor-size 48
}
hide-when-typing
Since: 0.1.10
If set, hides the cursor when pressing a key on the keyboard.
note
This setting might interfere with games running in Wine in native Wayland mode that use mouselook, such as first-person games. If your character's point of view jumps down when you press a key and move the mouse simultaneously, try disabling this setting.
cursor {
    hide-when-typing
}
hide-after-inactive-ms
Since: 0.1.10
If set, the cursor will automatically hide once this number of milliseconds passes since the last cursor movement.
cursor {
    // Hide the cursor after one second of inactivity.
    hide-after-inactive-ms 1000
}
overview
Since: 25.05
Settings for the Overview.
zoom
Control how much the workspaces zoom out in the overview.
zoom ranges from 0 to 0.75 where lower values make everything smaller.
// Make workspaces four times smaller than normal in the overview.
overview {
    zoom 0.25
}
backdrop-color
Set the backdrop color behind workspaces in the overview. The backdrop is also visible between workspaces when switching.
The alpha channel for this color will be ignored.
// Make the backdrop light.
overview {
    backdrop-color "#777777"
}
You can also set the color per-output in the output config.
workspace-shadow
Control the shadow behind workspaces visible in the overview.
Settings here mirror the normal shadow config in the layout section, so check the documentation there.
Workspace shadows are configured for a workspace size normalized to 1080 pixels tall, then zoomed out together with the workspace. Practically, this means that you'll want bigger spread, offset, and softness compared to window shadows.
// Disable workspace shadows in the overview.
overview {
    workspace-shadow {
        off
    }
}
xwayland-satellite
Since: next release
Settings for integration with xwayland-satellite.
When a recent enough xwayland-satellite is detected, niri will create the X11 sockets and set DISPLAY, then automatically spawn xwayland-satellite when an X11 client tries to connect.
If Xwayland dies, niri will keep watching the X11 socket and restart xwayland-satellite as needed.
This is very similar to how built-in Xwayland works in other compositors.
off disables the integration: niri won't create an X11 socket and won't set the DISPLAY environment variable.
path sets the path to the xwayland-satellite binary.
By default, it's just xwayland-satellite, so it's looked up like any other non-absolute program name.
// Use a custom build of xwayland-satellite.
xwayland-satellite {
    path "~/source/rs/xwayland-satellite/target/release/xwayland-satellite"
}
clipboard
Since: 25.02
Clipboard settings.
Set the disable-primary flag to disable the primary clipboard (middle-click paste).
Toggling this flag will only apply to applications started afterward.
clipboard {
    disable-primary
}
hotkey-overlay
Settings for the "Important Hotkeys" overlay.
skip-at-startup
Set the skip-at-startup flag if you don't want to see the hotkey help at niri startup.
hotkey-overlay {
    skip-at-startup
}
hide-not-bound
Since: next release
By default, niri will show the most important actions even if they aren't bound to any key, to prevent confusion.
Set the hide-not-bound flag if you want to hide all actions not bound to any key.
hotkey-overlay {
    hide-not-bound
}
You can customize which binds the hotkey overlay shows using the hotkey-overlay-title property.
Window Rules
Overview
Window rules let you adjust behavior for individual windows.
They have match and exclude directives that control which windows the rule should apply to, and a number of properties that you can set.
Window rules are processed in order of appearance in the config file. This means that you can put more generic rules first, then override them for specific windows later. For example:
// Set open-maximized to true for all windows.
window-rule {
    open-maximized true
}

// Then, for Alacritty, set open-maximized back to false.
window-rule {
    match app-id="Alacritty"
    open-maximized false
}
tip
In general, you cannot "unset" a property in a later rule, only set it to a different value.
Use the exclude directives to avoid applying a rule for specific windows.
Here are all matchers and properties that a window rule could have:
window-rule {
    match title="Firefox"
    match app-id="Alacritty"
    match is-active=true
    match is-focused=false
    match is-active-in-column=true
    match is-floating=true
    match is-window-cast-target=true
    match is-urgent=true
    match at-startup=true

    // Properties that apply once upon window opening.
    default-column-width { proportion 0.75; }
    default-window-height { fixed 500; }
    open-on-output "Some Company CoolMonitor 1234"
    open-on-workspace "chat"
    open-maximized true
    open-fullscreen true
    open-floating true
    open-focused false

    // Properties that apply continuously.
    draw-border-with-background false
    opacity 0.5
    block-out-from "screencast"
    // block-out-from "screen-capture"
    variable-refresh-rate true
    default-column-display "tabbed"
    default-floating-position x=100 y=200 relative-to="bottom-left"
    scroll-factor 0.75

    focus-ring {
        // off
        on
        width 4
        active-color "#7fc8ff"
        inactive-color "#505050"
        urgent-color "#9b0000"
        // active-gradient from="#80c8ff" to="#bbddff" angle=45
        // inactive-gradient from="#505050" to="#808080" angle=45 relative-to="workspace-view"
        // urgent-gradient from="#800" to="#a33" angle=45
    }

    border {
        // Same as focus-ring.
    }

    shadow {
        // on
        off
        softness 40
        spread 5
        offset x=0 y=5
        draw-behind-window true
        color "#00000064"
        // inactive-color "#00000064"
    }

    tab-indicator {
        active-color "red"
        inactive-color "gray"
        urgent-color "blue"
        // active-gradient from="#80c8ff" to="#bbddff" angle=45
        // inactive-gradient from="#505050" to="#808080" angle=45 relative-to="workspace-view"
        // urgent-gradient from="#800" to="#a33" angle=45
    }

    geometry-corner-radius 12
    clip-to-geometry true
    tiled-state true
    baba-is-float true

    min-width 100
    max-width 200
    min-height 300
    max-height 300
}
Window Matching
Each window rule can have several match and exclude directives.
In order for the rule to apply, a window needs to match any of the match directives, and none of the exclude directives.
window-rule {
    // Match all Telegram windows...
    match app-id=r#"^org\.telegram\.desktop$"#

    // ...except the media viewer window.
    exclude title="^Media viewer$"

    // Properties to apply.
    open-on-output "HDMI-A-1"
}
Match and exclude directives have the same syntax. There can be multiple matchers in one directive, then the window should match all of them for the directive to apply.
window-rule {
    // Match Firefox windows with Gmail in title.
    match app-id="firefox" title="Gmail"
}

window-rule {
    // Match Firefox, but only when it is active...
    match app-id="firefox" is-active=true

    // ...or match Telegram...
    match app-id=r#"^org\.telegram\.desktop$"#

    // ...but don't match the Telegram media viewer.
    // If you open a tab in Firefox titled "Media viewer",
    // it will not be excluded because it doesn't match the app-id
    // of this exclude directive.
    exclude app-id=r#"^org\.telegram\.desktop$"# title="Media viewer"
}
Let's look at the matchers in more detail.
title and app-id
These are regular expressions that should match anywhere in the window title and app ID respectively. You can read about the supported regular expression syntax here.
// Match windows with title containing "Mozilla Firefox",
// or windows with app ID containing "Alacritty".
window-rule {
    match title="Mozilla Firefox"
    match app-id="Alacritty"
}
Raw KDL strings can be helpful for writing out regular expressions:
window-rule {
    exclude app-id=r#"^org\.keepassxc\.KeePassXC$"#
}
You can find the title and the app ID of the currently focused window by running niri msg focused-window.
tip
Another way to find the window title and app ID is to configure the wlr/taskbar module in Waybar to include them in the tooltip:
"wlr/taskbar": {
    "tooltip-format": "{title} | {app_id}",
}
is-active
Can be true or false.
Matches active windows (same windows that have the active border / focus ring color).
Every workspace on the focused monitor will have one active window. This means that you will usually have multiple active windows (one per workspace), and when you switch between workspaces, you can see two active windows at once.
window-rule {
    match is-active=true
}
is-focused
Can be true or false.
Matches the window that has the keyboard focus.
Contrary to is-active, there can only be a single focused window.
Also, when opening a layer-shell application launcher or pop-up menu, the keyboard focus goes to layer-shell.
While layer-shell has the keyboard focus, windows will not match this rule.
window-rule {
    match is-focused=true
}
is-active-in-column
Since: 0.1.6
Can be true or false.
Matches the window that is the "active" window in its column.
Contrary to is-active, there is always one is-active-in-column window in each column.
It is the window that was last focused in the column, i.e. the one that will gain focus if this column is focused.
Since: 25.01 This rule will match true during the initial window opening.
window-rule {
    match is-active-in-column=true
}
is-floating
Since: 25.01
Can be true or false.
Matches floating windows.
note
This matcher will apply only after the window is already open.
This means that you cannot use it to change the window opening properties like default-window-height or open-on-workspace.
window-rule {
    match is-floating=true
}
is-window-cast-target
Since: 25.02
Can be true or false.
Matches true for windows that are target of an ongoing window screencast.
note
This only matches individual-window screencasts. It will not match windows that happen to be visible in a monitor screencast, for example.
// Indicate screencasted windows with red colors.
window-rule {
    match is-window-cast-target=true

    focus-ring {
        active-color "#f38ba8"
        inactive-color "#7d0d2d"
    }

    border {
        inactive-color "#7d0d2d"
    }

    shadow {
        color "#7d0d2d70"
    }

    tab-indicator {
        active-color "#f38ba8"
        inactive-color "#7d0d2d"
    }
}
Example:
is-urgent
Since: 25.05
Can be true or false.
Matches windows that request the user's attention.
window-rule {
    match is-urgent=true
}
at-startup
Since: 0.1.6
Can be true or false.
Matches during the first 60 seconds after starting niri.
This is useful for properties like open-on-output which you may want to apply only right after starting niri.
// Open windows on the HDMI-A-1 monitor at niri startup, but not afterwards.
window-rule {
    match at-startup=true
    open-on-output "HDMI-A-1"
}
Window Opening Properties
These properties apply once, when a window first opens.
To be precise, they apply at the point when niri sends the initial configure request to the window.
default-column-width
Set the default width for the new window.
This works for floating windows too, despite the word "column" in the name.
// Give Blender and GIMP some guaranteed width on opening.
window-rule {
    match app-id="^blender$"

    // GIMP app ID contains the version like "gimp-2.99",
    // so we only match the beginning (with ^) and not the end.
    match app-id="^gimp"

    default-column-width { fixed 1200; }
}
default-window-height
Since: 25.01
Set the default height for the new window.
// Open the Firefox picture-in-picture window as floating with 480×270 size.
window-rule {
    match app-id="firefox$" title="^Picture-in-Picture$"

    open-floating true
    default-column-width { fixed 480; }
    default-window-height { fixed 270; }
}
open-on-output
Make the window open on a specific output.
If such an output does not exist, the window will open on the currently focused output as usual.
If the window opens on an output that is not currently focused, the window will not be automatically focused.
// Open Firefox and Telegram (but not its Media Viewer)
// on a specific monitor.
window-rule {
    match app-id="firefox$"
    match app-id=r#"^org\.telegram\.desktop$"#
    exclude app-id=r#"^org\.telegram\.desktop$"# title="^Media viewer$"

    open-on-output "HDMI-A-1"
    // Or:
    // open-on-output "Some Company CoolMonitor 1234"
}
Since: 0.1.9 open-on-output can now use monitor manufacturer, model, and serial.
Before, it could only use the connector name.
open-on-workspace
Since: 0.1.6
Make the window open on a specific named workspace.
If such a workspace does not exist, the window will open on the currently focused workspace as usual.
If the window opens on an output that is not currently focused, the window will not be automatically focused.
// Open Fractal on the "chat" workspace.
window-rule {
    match app-id=r#"^org\.gnome\.Fractal$"#

    open-on-workspace "chat"
}
open-maximized
Make the window open as a maximized column.
// Maximize Firefox by default.
window-rule {
    match app-id="firefox$"

    open-maximized true
}
open-fullscreen
Make the window open fullscreen.
window-rule {
    open-fullscreen true
}
You can also set this to false to prevent a window from opening fullscreen.
// Make the Telegram media viewer open in windowed mode.
window-rule {
    match app-id=r#"^org\.telegram\.desktop$"# title="^Media viewer$"

    open-fullscreen false
}
open-floating
Since: 25.01
Make the window open in the floating layout.
// Open the Firefox picture-in-picture window as floating.
window-rule {
    match app-id="firefox$" title="^Picture-in-Picture$"

    open-floating true
}
You can also set this to false to prevent a window from opening in the floating layout.
// Open all windows in the tiling layout, overriding any auto-floating logic.
window-rule {
    open-floating false
}
open-focused
Since: 25.01
Set this to false to prevent this window from being automatically focused upon opening.
// Don't give focus to the GIMP startup splash screen.
window-rule {
    match app-id="^gimp" title="^GIMP Startup$"

    open-focused false
}
You can also set this to true to focus the window, even if normally it wouldn't get auto-focused.
// Always focus the KeePassXC-Browser unlock dialog.
//
// This dialog opens parented to the KeePassXC window rather than the browser,
// so it doesn't get auto-focused by default.
window-rule {
    match app-id=r#"^org\.keepassxc\.KeePassXC$"# title="^Unlock Database - KeePassXC$"

    open-focused true
}
Dynamic Properties
These properties apply continuously to open windows.
block-out-from
You can block out windows from xdg-desktop-portal screencasts. They will be replaced with solid black rectangles.
This can be useful for password managers or messenger windows, etc.
For layer-shell notification pop-ups and the like, you can use a block-out-from layer rule.

To preview and set up this rule, check the preview-render option in the debug section of the config.
caution
The window is not blocked out from third-party screenshot tools. If you open some screenshot tool with preview while screencasting, blocked out windows will be visible on the screencast.
The built-in screenshot UI is not affected by this problem though. If you open the screenshot UI while screencasting, you will be able to select the area to screenshot while seeing all windows normally, but on a screencast the selection UI will display with windows blocked out.
// Block out password managers from screencasts.
window-rule {
    match app-id=r#"^org\.keepassxc\.KeePassXC$"#
    match app-id=r#"^org\.gnome\.World\.Secrets$"#

    block-out-from "screencast"
}
Alternatively, you can block out the window out of all screen captures, including third-party screenshot tools. This way you avoid accidentally showing the window on a screencast when opening a third-party screenshot preview.
This setting will still let you use the interactive built-in screenshot UI, but it will block out the window from the fully automatic screenshot actions, such as screenshot-screen and screenshot-window.
The reasoning is that with an interactive selection, you can make sure that you avoid screenshotting sensitive content.
window-rule {
    block-out-from "screen-capture"
}
warning
Be careful when blocking out windows based on a dynamically changing window title.
For example, you might try to block out specific Firefox tabs like this:
window-rule {
    // Doesn't quite work! Try to block out the Gmail tab.
    match app-id="firefox$" title="- Gmail "

    block-out-from "screencast"
}
It will work, but when switching from a sensitive tab to a regular tab, the contents of the sensitive tab will show up on a screencast for an instant.
This is because window title (and app ID) are not double-buffered in the Wayland protocol, so they are not tied to specific window contents. There's no robust way for Firefox to synchronize visibly showing a different tab and changing the window title.
opacity
Set the opacity of the window.
0.0 is fully transparent, 1.0 is fully opaque.
This is applied on top of the window's own opacity, so semitransparent windows will become even more transparent.
Opacity is applied to every surface of the window individually, so subsurfaces and pop-up menus will show window content behind them.
Also, focus ring and border with background will show through semitransparent windows (see prefer-no-csd and the draw-border-with-background window rule below).
Opacity can be toggled on or off for a window using the toggle-window-rule-opacity action.
// Make inactive windows semitransparent.
window-rule {
    match is-active=false

    opacity 0.95
}
variable-refresh-rate
Since: 0.1.9
If set to true, whenever this window displays on an output with on-demand VRR, it will enable VRR on that output.
// Configure some output with on-demand VRR.
output "HDMI-A-1" {
    variable-refresh-rate on-demand=true
}

// Enable on-demand VRR when mpv displays on the output.
window-rule {
    match app-id="^mpv$"

    variable-refresh-rate true
}
default-column-display
Since: 25.02
Set the default display mode for columns created from this window.
This is used any time a window goes into its own column. For example:
- Opening a new window.
- Expelling a window into its own column.
- Moving a window from the floating layout to the tiling layout.
// Make Evince windows open as tabbed columns.
window-rule {
    match app-id="^evince$"

    default-column-display "tabbed"
}
default-floating-position
Since: 25.01
Set the initial position for this window when it opens on, or moves to the floating layout.
Afterward, the window will remember its last floating position.
By default, new floating windows open at the center of the screen, and windows from the tiling layout open close to their visual screen position.
The position uses logical coordinates relative to the working area.
By default, they are relative to the top-left corner of the working area, but you can change this by setting relative-to to one of these values: top-left, top-right, bottom-left, bottom-right, top, bottom, left, or right.
For example, if you have a bar at the top, then x=0 y=0 will put the top-left corner of the window directly below the bar.
If instead you write x=0 y=0 relative-to="top-right", then the top-right corner of the window will align with the top-right corner of the workspace, also directly below the bar.
When only one side is specified (e.g. top) the window will align to the center of that side.
The coordinates change direction based on relative-to.
For example, by default (top-left), x=100 y=200 will put the window 100 pixels to the right and 200 pixels down from the top-left corner.
If you use x=100 y=200 relative-to="bottom-left", it will put the window 100 pixels to the right and 200 pixels up from the bottom-left corner.
// Open the Firefox picture-in-picture window at the bottom-left corner of the screen
// with a small gap.
window-rule {
    match app-id="firefox$" title="^Picture-in-Picture$"

    default-floating-position x=32 y=32 relative-to="bottom-left"
}
You can use single-side relative-to to get a dropdown-like effect.
// Example: a "dropdown" terminal.
window-rule {
    // Match by "dropdown" app ID.
    // You need to set this app ID when running your terminal, e.g.:
    // spawn "alacritty" "--class" "dropdown"
    match app-id="^dropdown$"

    // Open it as floating.
    open-floating true
    // Anchor to the top edge of the screen.
    default-floating-position x=0 y=0 relative-to="top"
    // Half of the screen high.
    default-window-height { proportion 0.5; }
    // 80% of the screen wide.
    default-column-width { proportion 0.8; }
}
scroll-factor
Since: 25.02
Set a scroll factor for all scroll events sent to a window.
This will be multiplied with the scroll factor set for your input device in the input section.
// Make scrolling in Firefox a bit slower.
window-rule {
    match app-id="firefox$"

    scroll-factor 0.75
}
draw-border-with-background
Override whether the border and the focus ring draw with a background.
Set this to true to draw them as solid colored rectangles even for windows which agreed to omit their client-side decorations.
Set this to false to draw them as borders around the window even for windows which use client-side decorations.
This property can be useful for rectangular windows that do not support the xdg-decoration protocol.
| With Background | Without Background |
|---|---|
 |  |
window-rule {
    draw-border-with-background false
}
focus-ring and border
Since: 0.1.6
Override the focus ring and border options for the window.
These rules have the same options as the normal focus-ring and border config in the layout section, so check the documentation there.
However, in addition to off to disable the border/focus ring, this window rule has an on flag that enables the border/focus ring for the window even if it was otherwise disabled.
The on flag has precedence over the off flag, in case both are set.
window-rule {
    focus-ring {
        off
        width 2
    }
}

window-rule {
    border {
        on
        width 8
    }
}
shadow
Since: 25.02
Override the shadow options for the window.
This rule has the same options as the normal shadow config in the layout section, so check the documentation there.
However, in addition to on to enable the shadow, this window rule has an off flag that disables the shadow for the window even if it was otherwise enabled.
The on flag has precedence over the off flag, in case both are set.
// Turn on shadows for floating windows.
window-rule {
    match is-floating=true

    shadow {
        on
    }
}
tab-indicator
Since: 25.02
Override the tab indicator options for the window.
Options in this rule match the same options as the normal tab-indicator config in the layout section, so check the documentation there.
// Make KeePassXC tab have a dark red inactive color.
window-rule {
    match app-id=r#"^org\.keepassxc\.KeePassXC$"#

    tab-indicator {
        inactive-color "darkred"
    }
}
geometry-corner-radius
Since: 0.1.6
Set the corner radius of the window.
On its own, this setting will only affect the border and the focus ring—they will round their corners to match the geometry corner radius.
If you'd like to force-round the corners of the window itself, set clip-to-geometry true in addition to this setting.
window-rule {
    geometry-corner-radius 12
}
The radius is set in logical pixels, and controls the radius of the window itself, that is, the inner radius of the border:
Instead of one radius, you can set four, for each corner. The order is the same as in CSS: top-left, top-right, bottom-right, bottom-left.
window-rule {
    geometry-corner-radius 8 8 0 0
}
This way, you can match GTK 3 applications which have square bottom corners:
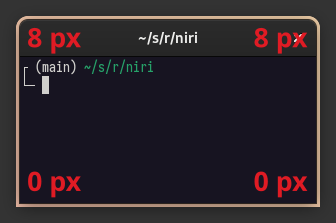
clip-to-geometry
Since: 0.1.6
Clips the window to its visual geometry.
This will cut out any client-side window shadows, and also round window corners according to geometry-corner-radius.
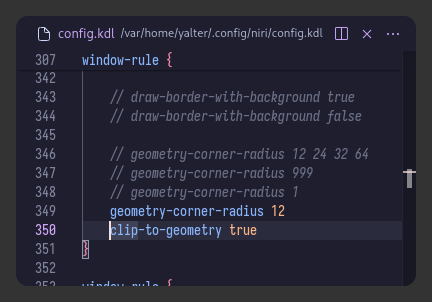
window-rule {
    clip-to-geometry true
}
Enable border, set geometry-corner-radius and clip-to-geometry, and you've got a classic setup:
prefer-no-csd

layout {
    focus-ring {
        off
    }

    border {
        width 2
    }
}

window-rule {
    geometry-corner-radius 12
    clip-to-geometry true
}
tiled-state
Since: 25.05
Informs the window that it is tiled. Usually, windows will react by becoming rectangular and hiding their client-side shadows. Windows that snap their size to a grid (e.g. terminals like foot) will usually disable this snapping when they are tiled.
By default, niri will set the tiled state to true together with prefer-no-csd in order to improve behavior for apps that don't support server-side decorations.
You can use this window rule to override this, for example to get rectangular windows with CSD.
// Make tiled windows rectangular while using CSD.
window-rule {
    match is-floating=false

    tiled-state true
}
baba-is-float
Since: 25.02
Make your windows FLOAT up and down.
This is an April Fools' 2025 feature.
window-rule {
    match is-floating=true

    baba-is-float true
}
https://github.com/user-attachments/assets/3f4cb1a4-40b2-4766-98b7-eec014c19509
Size Overrides
You can amend the window's minimum and maximum size in logical pixels.
Keep in mind that the window itself always has a final say in its size. These values instruct niri to never ask the window to be smaller than the minimum you set, or to be bigger than the maximum you set.
note
max-height will only apply to automatically-sized windows if it is equal to min-height.
Either set it equal to min-height, or change the window height manually after opening it with set-window-height.
This is a limitation of niri's window height distribution algorithm.
window-rule {
    min-width 100
    max-width 200
    min-height 300
    max-height 300
}
// Fix OBS with server-side decorations missing a minimum width.
window-rule {
    match app-id=r#"^com\.obsproject\.Studio$"#

    min-width 876
}
Layer Rules
Overview
Since: 25.01
Layer rules let you adjust behavior for individual layer-shell surfaces.
They have match and exclude directives that control which layer-shell surfaces the rule should apply to, and a number of properties that you can set.
Layer rules are processed and work very similarly to window rules, just with different matchers and properties. Please read the window rules wiki page to learn how matching works.
Here are all matchers and properties that a layer rule could have:
layer-rule {
    match namespace="waybar"
    match at-startup=true

    // Properties that apply continuously.
    opacity 0.5
    block-out-from "screencast"
    // block-out-from "screen-capture"

    shadow {
        on
        // off
        softness 40
        spread 5
        offset x=0 y=5
        draw-behind-window true
        color "#00000064"
        // inactive-color "#00000064"
    }

    geometry-corner-radius 12
    place-within-backdrop true
    baba-is-float true
}
Layer Surface Matching
Let's look at the matchers in more detail.
namespace
This is a regular expression that should match anywhere in the surface namespace. You can read about the supported regular expression syntax here.
// Match surfaces with namespace containing "waybar",
layer-rule {
    match namespace="waybar"
}
You can find the namespaces of all open layer-shell surfaces by running niri msg layers.
at-startup
Can be true or false.
Matches during the first 60 seconds after starting niri.
// Show layer-shell surfaces with 0.5 opacity at niri startup, but not afterwards.
layer-rule {
    match at-startup=true

    opacity 0.5
}
Dynamic Properties
These properties apply continuously to open layer-shell surfaces.
block-out-from
You can block out surfaces from xdg-desktop-portal screencasts or all screen captures. They will be replaced with solid black rectangles.
This can be useful for notifications.
The same caveats and instructions apply as for the block-out-from window rule, so check the documentation there.
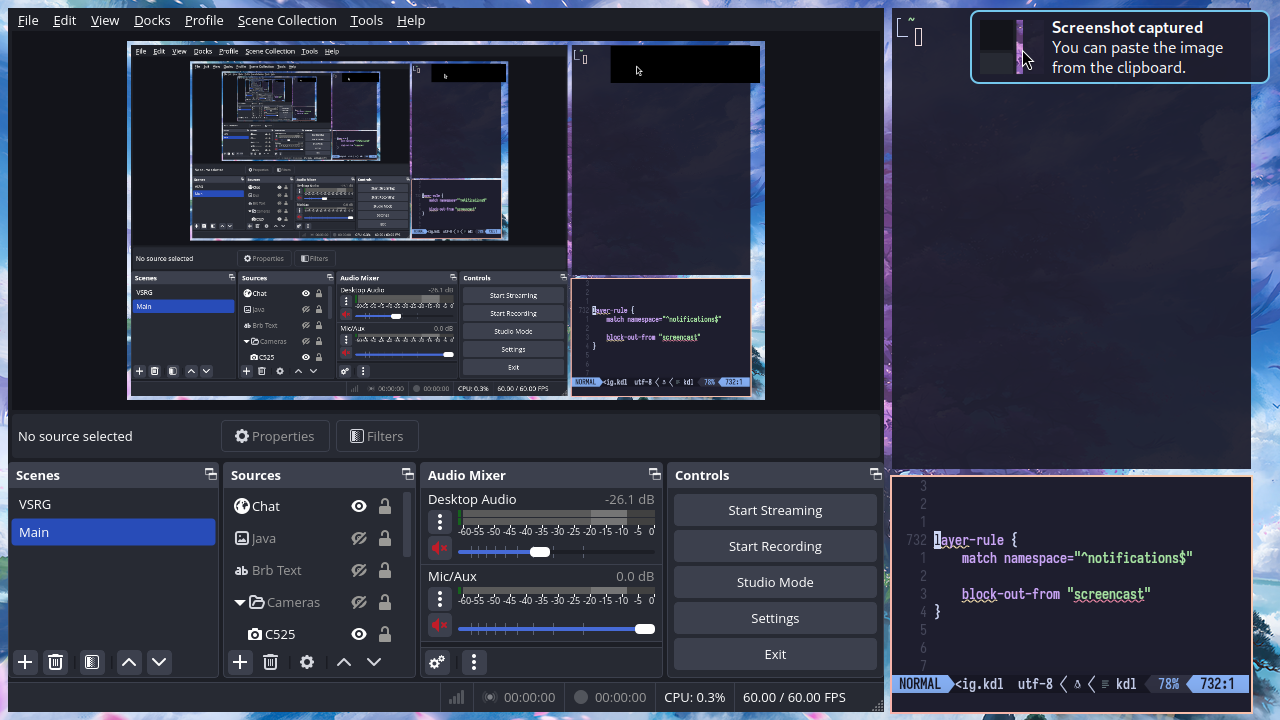
// Block out mako notifications from screencasts.
layer-rule {
    match namespace="^notifications$"

    block-out-from "screencast"
}
opacity
Set the opacity of the surface.
0.0 is fully transparent, 1.0 is fully opaque.
This is applied on top of the surface's own opacity, so semitransparent surfaces will become even more transparent.
Opacity is applied to every child of the layer-shell surface individually, so subsurfaces and pop-up menus will show window content behind them.
// Make fuzzel semitransparent.
layer-rule {
    match namespace="^launcher$"

    opacity 0.95
}
shadow
Since: 25.02
Override the shadow options for the surface.
These rules have the same options as the normal shadow config in the layout section, so check the documentation there.
Unlike window shadows, layer surface shadows always need to be enabled with a layer rule. That is, enabling shadows in the layout config section won't automatically enable them for layer surfaces.
note
Layer surfaces have no way to tell niri about their visual geometry. For example, if a layer surface includes some invisible margins (like mako), niri has no way of knowing that, and will draw the shadow behind the entire surface, including the invisible margins.
So to use niri shadows, you'll need to configure layer-shell clients to remove their own margins or shadows.
// Add a shadow for fuzzel.
layer-rule {
    match namespace="^launcher$"

    shadow {
        on
    }

    // Fuzzel defaults to 10 px rounded corners.
    geometry-corner-radius 10
}
geometry-corner-radius
Since: 25.02
Set the corner radius of the surface.
This setting will only affect the shadow—it will round its corners to match the geometry corner radius.
layer-rule {
    match namespace="^launcher$"

    geometry-corner-radius 12
}
place-within-backdrop
Since: 25.05
Set to true to place the surface into the backdrop visible in the Overview and between workspaces.
This will only work for background layer surfaces that ignore exclusive zones (typical for wallpaper tools). Layers within the backdrop will ignore all input.
// Put swaybg inside the overview backdrop.
layer-rule {
    match namespace="^wallpaper$"

    place-within-backdrop true
}
baba-is-float
Since: 25.05
Make your layer surfaces FLOAT up and down.
This is a natural extension of the April Fools' 2025 feature.
// Make fuzzel FLOAT.
layer-rule {
    match namespace="^launcher$"

    baba-is-float true
}
Animations
Overview
Niri has several animations which you can configure in the same way. Additionally, you can disable or slow down all animations at once.
Here's a quick glance at the available animations with their default values.
animations {
    // Uncomment to turn off all animations.
    // You can also put "off" into each individual animation to disable it.
    // off

    // Slow down all animations by this factor. Values below 1 speed them up instead.
    // slowdown 3.0

    // Individual animations.

    workspace-switch {
        spring damping-ratio=1.0 stiffness=1000 epsilon=0.0001
    }

    window-open {
        duration-ms 150
        curve "ease-out-expo"
    }

    window-close {
        duration-ms 150
        curve "ease-out-quad"
    }

    horizontal-view-movement {
        spring damping-ratio=1.0 stiffness=800 epsilon=0.0001
    }

    window-movement {
        spring damping-ratio=1.0 stiffness=800 epsilon=0.0001
    }

    window-resize {
        spring damping-ratio=1.0 stiffness=800 epsilon=0.0001
    }

    config-notification-open-close {
        spring damping-ratio=0.6 stiffness=1000 epsilon=0.001
    }

    screenshot-ui-open {
        duration-ms 200
        curve "ease-out-quad"
    }

    overview-open-close {
        spring damping-ratio=1.0 stiffness=800 epsilon=0.0001
    }
}
Animation Types
There are two animation types: easing and spring. Each animation can be either an easing or a spring.
Easing
This is a relatively common animation type that changes the value over a set duration using an interpolation curve.
To use this animation, set the following parameters:
duration-ms: duration of the animation in milliseconds.curve: the easing curve to use.
animations {
    window-open {
        duration-ms 150
        curve "ease-out-expo"
    }
}
Currently, niri only supports four curves:
ease-out-quadSince: 0.1.5ease-out-cubicease-out-expolinearSince: 0.1.6
You can get a feel for them on pages like easings.net.
Spring
Spring animations use a model of a physical spring to animate the value. They notably feel better with touchpad gestures, because they take into account the velocity of your fingers as you release the swipe. Springs can also oscillate / bounce at the end with the right parameters if you like that sort of thing, but they don't have to (and by default they mostly don't).
Due to springs using a physical model, the animation parameters are less obvious and generally should be tuned with trial and error. Notably, you cannot directly set the duration. You can use the Elastic app to help visualize how the spring parameters change the animation.
A spring animation is configured like this, with three mandatory parameters:
animations {
    workspace-switch {
        spring damping-ratio=1.0 stiffness=1000 epsilon=0.0001
    }
}
The damping-ratio goes from 0.1 to 10.0 and has the following properties:
- below 1.0: underdamped spring, will oscillate in the end.
- above 1.0: overdamped spring, won't oscillate.
- 1.0: critically damped spring, comes to rest in minimum possible time without oscillations.
However, even with damping ratio = 1.0, the spring animation may oscillate if "launched" with enough velocity from a touchpad swipe.
warning
Overdamped springs currently have some numerical stability issues and may cause graphical glitches.
Therefore, setting damping-ratio above 1.0 is not recommended.
Lower stiffness will result in a slower animation more prone to oscillation.
Set epsilon to a lower value if the animation "jumps" at the end.
tip
The spring mass (which you can see in Elastic) is hardcoded to 1.0 and cannot be changed.
Instead, change stiffness proportionally.
E.g. increasing mass by 2× is the same as decreasing stiffness by 2×.
Animations
Now let's go into more detail on the animations that you can configure.
workspace-switch
Animation when switching workspaces up and down, including after the vertical touchpad gesture (a spring is recommended).
animations {
    workspace-switch {
        spring damping-ratio=1.0 stiffness=1000 epsilon=0.0001
    }
}
window-open
Window opening animation.
This one uses an easing type by default.
animations {
    window-open {
        duration-ms 150
        curve "ease-out-expo"
    }
}
custom-shader
Since: 0.1.6
You can write a custom shader for drawing the window during an open animation.
See this example shader for a full documentation with several animations to experiment with.
If a custom shader fails to compile, niri will print a warning and fall back to the default, or previous successfully compiled shader.
When running niri as a systemd service, you can see the warnings in the journal: journalctl -ef /usr/bin/niri
warning
Custom shaders do not have a backwards compatibility guarantee. I may need to change their interface as I'm developing new features.
Example: open will fill the current geometry with a solid gradient that gradually fades in.
animations {
    window-open {
        duration-ms 250
        curve "linear"

        custom-shader r"
            vec4 open_color(vec3 coords_geo, vec3 size_geo) {
                vec4 color = vec4(0.0);

                if (0.0 <= coords_geo.x && coords_geo.x <= 1.0
                        && 0.0 <= coords_geo.y && coords_geo.y <= 1.0)
                {
                    vec4 from = vec4(1.0, 0.0, 0.0, 1.0);
                    vec4 to = vec4(0.0, 1.0, 0.0, 1.0);
                    color = mix(from, to, coords_geo.y);
                }

                return color * niri_clamped_progress;
            }
        "
    }
}
window-close
Since: 0.1.5
Window closing animation.
This one uses an easing type by default.
animations {
    window-close {
        duration-ms 150
        curve "ease-out-quad"
    }
}
custom-shader
Since: 0.1.6
You can write a custom shader for drawing the window during a close animation.
See this example shader for a full documentation with several animations to experiment with.
If a custom shader fails to compile, niri will print a warning and fall back to the default, or previous successfully compiled shader.
When running niri as a systemd service, you can see the warnings in the journal: journalctl -ef /usr/bin/niri
warning
Custom shaders do not have a backwards compatibility guarantee. I may need to change their interface as I'm developing new features.
Example: close will fill the current geometry with a solid gradient that gradually fades away.
animations {
    window-close {
        custom-shader r"
            vec4 close_color(vec3 coords_geo, vec3 size_geo) {
                vec4 color = vec4(0.0);

                if (0.0 <= coords_geo.x && coords_geo.x <= 1.0
                        && 0.0 <= coords_geo.y && coords_geo.y <= 1.0)
                {
                    vec4 from = vec4(1.0, 0.0, 0.0, 1.0);
                    vec4 to = vec4(0.0, 1.0, 0.0, 1.0);
                    color = mix(from, to, coords_geo.y);
                }

                return color * (1.0 - niri_clamped_progress);
            }
        "
    }
}
horizontal-view-movement
All horizontal camera view movement animations, such as:
- When a window off-screen is focused and the camera scrolls to it.
- When a new window appears off-screen and the camera scrolls to it.
- After a horizontal touchpad gesture (a spring is recommended).
animations {
    horizontal-view-movement {
        spring damping-ratio=1.0 stiffness=800 epsilon=0.0001
    }
}
window-movement
Since: 0.1.5
Movement of individual windows within a workspace.
Includes:
- Moving window columns with
move-column-leftandmove-column-right. - Moving windows inside a column with
move-window-upandmove-window-down. - Moving windows out of the way upon window opening and closing.
- Window movement between columns when consuming/expelling.
This animation does not include the camera view movement, such as scrolling the workspace left and right.
animations {
    window-movement {
        spring damping-ratio=1.0 stiffness=800 epsilon=0.0001
    }
}
window-resize
Since: 0.1.5
Window resize animation.
Only manual window resizes are animated, i.e. when you resize the window with switch-preset-column-width or maximize-column.
Also, very small resizes (up to 10 pixels) are not animated.
animations {
    window-resize {
        spring damping-ratio=1.0 stiffness=800 epsilon=0.0001
    }
}
custom-shader
Since: 0.1.6
You can write a custom shader for drawing the window during a resize animation.
See this example shader for a full documentation with several animations to experiment with.
If a custom shader fails to compile, niri will print a warning and fall back to the default, or previous successfully compiled shader.
When running niri as a systemd service, you can see the warnings in the journal: journalctl -ef /usr/bin/niri
warning
Custom shaders do not have a backwards compatibility guarantee. I may need to change their interface as I'm developing new features.
Example: resize will show the next (after resize) window texture right away, stretched to the current geometry.
animations {
    window-resize {
        custom-shader r"
            vec4 resize_color(vec3 coords_curr_geo, vec3 size_curr_geo) {
                vec3 coords_tex_next = niri_geo_to_tex_next * coords_curr_geo;
                vec4 color = texture2D(niri_tex_next, coords_tex_next.st);
                return color;
            }
        "
    }
}
config-notification-open-close
The open/close animation of the config parse error and new default config notifications.
This one uses an underdamped spring by default (damping-ratio=0.6) which causes a slight oscillation in the end.
animations {
    config-notification-open-close {
        spring damping-ratio=0.6 stiffness=1000 epsilon=0.001
    }
}
screenshot-ui-open
Since: 0.1.8
The open (fade-in) animation of the screenshot UI.
animations {
    screenshot-ui-open {
        duration-ms 200
        curve "ease-out-quad"
    }
}
overview-open-close
Since: 25.05
The open/close zoom animation of the Overview.
animations {
    overview-open-close {
        spring damping-ratio=1.0 stiffness=800 epsilon=0.0001
    }
}
Synchronized Animations
Since: 0.1.5
Sometimes, when two animations are meant to play together synchronized, niri will drive them both with the same configuration.
For example, if a window resize causes the view to move, then that view movement animation will also use the window-resize configuration (rather than the horizontal-view-movement configuration).
This is especially important for animated resizes to look good when using center-focused-column "always".
As another example, resizing a window in a column vertically causes other windows to move up or down into their new position.
This movement will use the window-resize configuration, rather than the window-movement configuration, to keep the animations synchronized.
A few actions are still missing this synchronization logic, since in some cases it is difficult to implement properly. Therefore, for the best results, consider using the same parameters for related animations (they are all the same by default):
horizontal-view-movementwindow-movementwindow-resize
Gestures
Overview
Since: 25.02
The gestures config section contains gesture settings.
For an overview of all niri gestures, see the Gestures wiki page.
Here's a quick glance at the available settings along with their default values.
gestures {
    dnd-edge-view-scroll {
        trigger-width 30
        delay-ms 100
        max-speed 1500
    }

    dnd-edge-workspace-switch {
        trigger-height 50
        delay-ms 100
        max-speed 1500
    }

    hot-corners {
        // off
    }
}
dnd-edge-view-scroll
Scroll the tiling view when moving the mouse cursor against a monitor edge during drag-and-drop (DnD). Also works on a touchscreen.
This will work for regular drag-and-drop (e.g. dragging a file from a file manager), and for window interactive move when targeting the tiling layout.
The options are:
trigger-width: size of the area near the monitor edge that will trigger the scrolling, in logical pixels.delay-ms: delay in milliseconds before the scrolling starts. Avoids unwanted scrolling when dragging things across monitors.max-speed: maximum scrolling speed in logical pixels per second. The scrolling speed increases linearly as you move your mouse cursor fromtrigger-widthto the very edge of the monitor.
gestures {
    // Increase the trigger area and maximum speed.
    dnd-edge-view-scroll {
        trigger-width 100
        max-speed 3000
    }
}
dnd-edge-workspace-switch
Since: 25.05
Scroll the workspaces up/down when moving the mouse cursor against a monitor edge during drag-and-drop (DnD) while in the overview. Also works on a touchscreen.
The options are:
trigger-height: size of the area near the monitor edge that will trigger the scrolling, in logical pixels.delay-ms: delay in milliseconds before the scrolling starts. Avoids unwanted scrolling when dragging things across monitors.max-speed: maximum scrolling speed; 1500 corresponds to one screen height per second. The scrolling speed increases linearly as you move your mouse cursor fromtrigger-widthto the very edge of the monitor.
gestures {
    // Increase the trigger area and maximum speed.
    dnd-edge-workspace-switch {
        trigger-height 100
        max-speed 3000
    }
}
hot-corners
Since: 25.05
Put your mouse at the very top-left corner of a monitor to toggle the overview. Also works during drag-and-dropping something.
off disables the hot corners.
// Disable the hot corners.
gestures {
    hot-corners {
        off
    }
}
Debug Options
Overview
Niri has several options that are only useful for debugging, or are experimental and have known issues. They are not meant for normal use.
caution
These options are not covered by the config breaking change policy. They can change or stop working at any point with little notice.
Here are all the options at a glance:
debug {
preview-render "screencast"
// preview-render "screen-capture"
enable-overlay-planes
disable-cursor-plane
disable-direct-scanout
restrict-primary-scanout-to-matching-format
render-drm-device "/dev/dri/renderD129"
force-pipewire-invalid-modifier
dbus-interfaces-in-non-session-instances
wait-for-frame-completion-before-queueing
wait-for-frame-completion-in-pipewire
emulate-zero-presentation-time
disable-resize-throttling
disable-transactions
keep-laptop-panel-on-when-lid-is-closed
disable-monitor-names
strict-new-window-focus-policy
honor-xdg-activation-with-invalid-serial
skip-cursor-only-updates-during-vrr
deactivate-unfocused-windows
}
binds {
Mod+Shift+Ctrl+T { toggle-debug-tint; }
Mod+Shift+Ctrl+O { debug-toggle-opaque-regions; }
Mod+Shift+Ctrl+D { debug-toggle-damage; }
}
preview-render
Make niri render the monitors the same way as for a screencast or a screen capture.
Useful for previewing the block-out-from window rule.
debug {
preview-render "screencast"
// preview-render "screen-capture"
}
enable-overlay-planes
Enable direct scanout into overlay planes. May cause frame drops during some animations on some hardware (which is why it is not the default).
Direct scanout into the primary plane is always enabled.
debug {
enable-overlay-planes
}
disable-cursor-plane
Disable the use of the cursor plane. The cursor will be rendered together with the rest of the frame.
Useful to work around driver bugs on specific hardware.
debug {
disable-cursor-plane
}
disable-direct-scanout
Disable direct scanout to both the primary plane and the overlay planes.
debug {
disable-direct-scanout
}
restrict-primary-scanout-to-matching-format
Restricts direct scanout to the primary plane to when the window buffer exactly matches the composition swapchain format.
This flag may prevent unexpected bandwidth changes when going between composition and scanout. The plan is to make it default in the future, when we implement a way to tell the clients the composition swapchain format. As is, it may prevent some clients (mpv on my machine) from scanning out to the primary plane.
debug {
restrict-primary-scanout-to-matching-format
}
render-drm-device
Override the DRM device that niri will use for all rendering.
You can set this to make niri use a different primary GPU than the default one.
debug {
render-drm-device "/dev/dri/renderD129"
}
force-pipewire-invalid-modifier
Since: 25.01
Forces PipeWire screencasting to use the invalid modifier, even when DRM offers more modifiers.
Useful for testing the invalid modifier code path that is hit by drivers that don't support modifiers.
debug {
force-pipewire-invalid-modifier
}
dbus-interfaces-in-non-session-instances
Make niri create its D-Bus interfaces even if it's not running as a --session.
Useful for testing screencasting changes without having to relogin.
The main niri instance will not currently take back the interfaces when you close the test instance, so you will need to relogin in the end to make screencasting work again.
debug {
dbus-interfaces-in-non-session-instances
}
wait-for-frame-completion-before-queueing
Wait until every frame is done rendering before handing it over to DRM.
Useful for diagnosing certain synchronization and performance problems.
debug {
wait-for-frame-completion-before-queueing
}
wait-for-frame-completion-in-pipewire
Since: 25.05
Wait until every screencast frame is done rendering before handing it over to PipeWire.
Sometimes helps on NVIDIA to prevent glitched frames when screencasting.
This debug flag will eventually be removed once we handle this properly (via explicit sync in PipeWire).
debug {
wait-for-frame-completion-in-pipewire
}
emulate-zero-presentation-time
Emulate zero (unknown) presentation time returned from DRM.
This is a thing on NVIDIA proprietary drivers, so this flag can be used to test that niri doesn't break too hard on those systems.
debug {
emulate-zero-presentation-time
}
disable-resize-throttling
Since: 0.1.9
Disable throttling resize events sent to windows.
By default, when resizing quickly (e.g. interactively), a window will only receive the next size once it has made a commit for the previously requested size. This is required for resize transactions to work properly, and it also helps certain clients which don't batch incoming resizes from the compositor.
Disabling resize throttling will send resizes to windows as fast as possible, which is potentially very fast (for example, on a 1000 Hz mouse).
debug {
disable-resize-throttling
}
disable-transactions
Since: 0.1.9
Disable transactions (resize and close).
By default, windows which must resize together, do resize together. For example, all windows in a column must resize at the same time to maintain the combined column height equal to the screen height, and to maintain the same window width.
Transactions make niri wait until all windows finish resizing before showing them all on screen in one, synchronized frame. For them to work properly, resize throttling shouldn't be disabled (with the previous debug flag).
debug {
disable-transactions
}
keep-laptop-panel-on-when-lid-is-closed
Since: 0.1.10
By default, niri will disable the internal laptop monitor when the laptop lid is closed. This flag turns off this behavior and will leave the internal laptop monitor on.
debug {
keep-laptop-panel-on-when-lid-is-closed
}
disable-monitor-names
Since: 0.1.10
Disables the make/model/serial monitor names, as if niri fails to read them from the EDID.
Use this flag to work around a crash present in 0.1.9 and 0.1.10 when connecting two monitors with matching make/model/serial.
debug {
disable-monitor-names
}
strict-new-window-focus-policy
Since: 25.01
Disables heuristic automatic focusing for new windows. Only windows that activate themselves with a valid xdg-activation token will be focused.
debug {
strict-new-window-focus-policy
}
honor-xdg-activation-with-invalid-serial
Since: 25.05
Widely-used clients such as Discord and Telegram make fresh xdg-activation tokens upon clicking on their tray icon or on their notification. Most of the time, these fresh tokens will have invalid serials, because the app needs to be focused to get a valid serial, and if the user clicks on a tray icon or a notification, it is usually because the app isn't focused, and the user wants to focus it.
By default, niri ignores xdg-activation tokens with invalid serials, to prevent windows from randomly stealing focus. This debug flag makes niri honor such tokens, making the aforementioned widely-used apps get focus when clicking on their tray icon or notification.
Amusingly, clicking on a notification sends the app a perfectly valid activation token from the notification daemon, but these apps seem to simply ignore it. Maybe in the future these apps/toolkits (Electron, Qt) are fixed, making this debug flag unnecessary.
debug {
honor-xdg-activation-with-invalid-serial
}
skip-cursor-only-updates-during-vrr
Since: next release
Skips redrawing the screen from cursor input while variable refresh rate is active.
Useful for games where the cursor isn't drawn internally to prevent erratic VRR shifts in response to cursor movement.
Note that the current implementation has some issues, for example when there's nothing redrawing the screen (like a game), the rendering will appear to completely freeze (since cursor movements won't cause redraws).
debug {
skip-cursor-only-updates-during-vrr
}
deactivate-unfocused-windows
Since: next release
Some clients (notably, Chromium- and Electron-based, like Teams or Slack) erroneously use the Activated xdg window state instead of keyboard focus for things like deciding whether to send notifications for new messages, or for picking where to show an IME popup. Niri keeps the Activated state on unfocused workspaces and invisible tabbed windows (to reduce unwanted animations), surfacing bugs in these applications.
Set this debug flag to work around these problems. It will cause niri to drop the Activated state for all unfocused windows.
debug {
deactivate-unfocused-windows
}
Key Bindings
These are not debug options, but rather key bindings.
toggle-debug-tint
Tints all surfaces green, unless they are being directly scanned out.
Useful to check if direct scanout is working.
binds {
Mod+Shift+Ctrl+T { toggle-debug-tint; }
}
debug-toggle-opaque-regions
Since: 0.1.6
Tints regions marked as opaque with blue and the rest of the render elements with red.
Useful to check how Wayland surfaces and internal render elements mark their parts as opaque, which is a rendering performance optimization.
binds {
Mod+Shift+Ctrl+O { debug-toggle-opaque-regions; }
}
debug-toggle-damage
Since: 0.1.6
Tints damaged regions with red.
binds {
Mod+Shift+Ctrl+D { debug-toggle-damage; }
}
Design Principles
These are some of the general principles for the design of niri's window layout. They can be sidestepped in specific circumstances if there's a good reason.
- Opening a new window should not affect the sizes of any existing windows.
- The focused window should not move around on its own.
- In particular: windows opening, closing, and resizing to the left of the focused window should not cause it to visually move.
- Actions should apply immediately.
- Things like resizing or consuming into column take effect immediately, even if the window needs time to catch up.
- This is important both for compositor responsiveness and predictability, and for keeping the code sane and free of edge cases and unnecessary asynchrony.
- If a window or popup is larger than the screen, it should be aligned in the top left corner.
- The top left area of a window is more likely to contain something important, so it should always be visible.
- Setting window width or height to a fixed pixel size (e.g.
set-column-width 1280ordefault-column-width { fixed 1280; }) will set the size of the window itself, however setting to a proportional size (e.g.set-column-width 50%) will set the size of the tile, including the border added by niri.- With proportions, the user is looking to tile multiple windows on the screen, so they should include borders.
- With fixed sizes, the user wants to test a specific client size or take a specifically sized screenshot, so they should affect the window directly.
- After the size is set, it is always converted to a value that includes the borders, to make the code sane. That is,
set-column-width 1000followed by changing the niri border width will resize the window accordingly.
And here are some more principles I try to follow throughout niri.
-
When disabled, eye-candy features should not affect the performance.
- Things like animations and custom shaders do not run and are not present in the render tree when disabled. Extra offscreen rendering is avoided.
- Animations specifically are still "started" even when disabled, but with a duration of 0 (this way, they end as soon as the time is advanced). This does not impact performance, but helps avoid a lot of edge cases in the code.
-
Eye-candy features should not cause unreasonable excessive rendering.
- For example, clip-to-geometry will prevent direct scanout in many cases (since the window surface is not completely visible). But in the cases where the surface or the subsurface is completely visible (fully within the clipped region), it will still allow for direct scanout.
- For example, animations can cause damage and even draw to an offscreen every frame, because they are expected to be short (and can be disabled). However, something like the rounded corners shader should not offscreen or cause excessive damage every frame, because it is long-running and constantly active.
-
Be mindful of invisible state.
This is niri state that is not immediately apparent from looking at the screen. This is not bad per se, but you should carefully consider how to reduce the surprise factor.
- For example, when a monitor disconnects, all its workspaces move to another connected monitor. In order to be able to restore these workspaces when the first monitor connects again, these workspaces keep the knowledge of which was their original monitor—this is an example of invisible state, since you can't tell it in any way by looking at the screen. This can have surprising consequences: imagine disconnecting a monitor at home, going to work, completely rearranging the windows there, then coming back home, and suddenly some random workspaces end up on your home monitor. In order to reduce this surprise factor, whenever a new window appears on a workspace, that workspace resets its original monitor to its current monitor. This way, the workspaces you actively worked on remain where they were.
- For example, niri preserves the view position whenever a window appears, or whenever a window goes full-screen, to restore it afterward. This way, dealing with temporary things like dialogs opening and closing, or toggling full-screen, becomes less annoying, since it doesn't mess up the view position. This is also invisible state, as you cannot tell by looking at the screen where closing a window will restore the view position. If taken to the extreme (previous view position saved forever for every open window), this can be surprising, as closing long-running windows would result in the view shifting around pretty much randomly. To reduce this surprise factor, niri remembers only one last view position per workspace, and forgets this stored view position upon window focus change.
Developing niri
Running a Local Build
The main way of testing niri during development is running it as a nested window. The second step is usually switching to a different TTY and running niri there.
Once a feature or fix is reasonably complete, you generally want to run a local build as your main compositor for proper testing. The easiest way to do that is to install niri normally (from a distro package for example), then overwrite the binary with sudo cp ./target/release/niri /usr/bin/niri. Do make sure that you know how to revert to a working version in case everything breaks though.
If you use an RPM-based distro, you can generate an RPM package for a local build with cargo generate-rpm.
Logging Levels
Niri uses tracing for logging. This is how logging levels are used:
error!: programming errors and bugs that are recoverable. Things you'd normally useunwrap()for. However, when a Wayland compositor crashes, it brings down the entire session, so it's better to recover and log anerror!whenever reasonable. If you see anERRORin the niri log, that always indicates a bug.warn!: something bad but still possible happened. Informing the user that they did something wrong, or that their hardware did something weird, falls into this category. For example, config parsing errors should be indicated with awarn!.info!: the most important messages related to normal operation. Running niri withRUST_LOG=niri=infoshould not make the user want to disable logging altogether.debug!: less important messages related to normal operation. Running niri withdebug!messages hidden should not negatively impact the UX.trace!: everything that can be useful for debugging but is otherwise too spammy or performance intensive.trace!messages are compiled out of release builds.
Tests
We have some unit tests, most prominently for the layout code and for config parsing.
When adding new operations to the layout, add them to the Op enum at the bottom of src/layout/mod.rs (this will automatically include it in the randomized tests), and if applicable to the every_op arrays below.
When adding new config options, include them in the config parsing test.
Running Tests
Make sure to run cargo test --all to run tests from sub-crates too.
Some tests are a bit too slow to run normally, like the randomized tests of the layout code, so they are normally skipped. Set the RUN_SLOW_TESTS variable to run them:
env RUN_SLOW_TESTS=1 cargo test --all
It also usually helps to run the randomized tests for a longer period, so that they can explore more inputs. You can control this with environment variables. This is how I usually run tests before pushing:
env RUN_SLOW_TESTS=1 PROPTEST_CASES=200000 PROPTEST_MAX_GLOBAL_REJECTS=200000 RUST_BACKTRACE=1 cargo test --release --all
Visual Tests
The niri-visual-tests sub-crate is a GTK application that runs hard-coded test cases so that you can visually check that they look right. It uses mock windows with the real layout and rendering code. It is especially helpful when working on animations.
Profiling
We have integration with the Tracy profiler which you can enable by building niri with a feature flag:
cargo build --release --features=profile-with-tracy-ondemand
Then you can open Tracy (you will need the latest stable release) and attach to a running niri instance to collect profiling data. Profiling data is collected "on demand"—that is, only when Tracy is connected. You can run a niri build like this as your main compositor if you'd like.
note
If you need to profile niri startup or the niri CLI, you can opt for "always on" profiling instead, using this feature flag:
cargo build --release --features=profile-with-tracy
When compiled this way, niri will always collect profiling data, so you can't run a build like this as your main compositor.
To make a niri function show up in Tracy, instrument it like this:
#![allow(unused)] fn main() { pub fn some_function() { let _span = tracy_client::span!("some_function"); // Code of the function. } }
You can also enable Rust memory allocation profiling with --features=profile-with-tracy-allocations.
Fractional Layout
There are two main coordinate spaces in niri: physical (pixels of every individual output) and logical (shared among all outputs, takes into account the scale of every output). Wayland clients mostly work in the logical space, and it's the most convenient space to do all the layout in, since it bakes in the output scaling factor.
However, many things need to be sized or positioned at integer physical coordinates.
For example, Wayland toplevel buffers are assumed to be placed at an integer physical pixel on an output (and WaylandSurfaceRenderElement will do that for you).
Borders and focus rings should also have a width equal to an integer number of physical pixels to stay crisp (not to mention that SolidColorRenderElement does not anti-alias lines at fractional pixel positions).
Integer physical coordinates do not necessarily correspond to integer logical coordinates though. Even with an integer scale = 2, a physical pixel at (1, 1) will be at the logical position of (0.5, 0.5). This problem becomes much worse with fractional scale factors where most integer logical coordinates will fall on fractional physical coordinates.
Thus, niri uses fractional logical coordinates for most of its layout. However, one needs to be very careful to keep things aligned to the physical grid to avoid artifacts like:
- Border width alternating 1 px thicker/thinner
- Border showing 1 px off from the window at certain positions
- 1 px gaps around rounded corners
- Slightly blurry window contents during resizes
- And so on...
The way it's handled in niri is:
-
All relevant sizes on a workspace are rounded to an integer physical coordinate according to the current output scale. Things like struts, gaps, border widths, working area location.
It's important to understand that they remain fractional numbers in the logical space, but these numbers correspond to an integer number of pixels in the physical space. The rounding looks something like:
(logical_size * scale).round() / scale. Whenever a workspace moves to an output with a different scale (or the output scale changes), all sizes are re-rounded from their original configured values to align with the new physical space. -
The view offset and individual column/tile render offsets are not rounded to physical pixels, but:
-
tiles_with_render_positions()rounds tile positions to physical pixels as it returns them, -
Custom shaders like opening, closing and resizing windows, are also careful to keep positions and sizes rounded to the physical pixels.
The idea is that every tile can assume that it is rendered at an integer physical coordinate, therefore when shifting the position by, say, border width (also rounded to integer physical coordinates), the new position will stay rounded to integer physical coordinates. The same logic works for the rest of the layout thanks to gaps, struts and working area being similarly rounded. This way, the entire layout is always aligned, as long as it is positioned at an integer physical coordinate (which rounding the tile positions effectively achieves).
Redraw Loop
On a TTY, only one frame can be submitted to an output at a time, and the compositor must wait until the output repaints (indicated by a VBlank) to be able to submit the next frame.
In niri we keep track of this via the RedrawState enum that you can find in an OutputState.
Here's a diagram of state transitions for the RedrawState state machine:

Idle is the default state, when the output does not need to be repainted.
Any operation that may cause the screen to update calls queue_redraw(), which moves the output to a Queued state.
Then, at the end of an event loop dispatch, niri calls redraw() for every Queued output.
If the redraw causes damage (i.e. something on the output changed), we move into the WaitingForVBlank state, since we cannot redraw until we receive a VBlank event.
However, if there's no damage, we do not return to Idle right away.
Instead, we set a timer to fire roughly at when the next VBlank would occur, and transition to a WaitingForEstimatedVBlank state.
This is necessary in order to throttle frame callbacks sent to applications to at most once per output refresh cycle. Without this throttling, applications can start continuously redrawing without damage (for instance, if the application window is partially off-screen, and it is only the off-screen part that changes), and eating a lot of CPU in the process.
Then, either the estimated VBlank timer completes, and we go back to Idle, or maybe we call queue_redraw() once more and try to redraw again.
Animation Timing
Time, Dr. Freeman? Is it really that... time again?
A compositor deals with one or more monitors on mostly fixed refresh cycles. For example, a 170 Hz monitor can draw a frame every ~5.88 ms.
Most of the time, the compositor doesn't actually redraw the monitor: when nothing changes on screen (e.g. you're reading a document and aren't moving your cursor), it would be wasteful to wake up the GPU to composite the same image. During an animation however, screen contents do change every frame. Niri will generally start drawing the next frame as soon as the previous one shows up on screen.
Since the monitor refresh cycle is fixed in most cases (even with VRR, there's a maximum refresh rate), the compositor can predict when the next frame will show up on the monitor, and render ongoing animations for that exact moment in time. This way, all animation frames are perfectly timed with no jitter, regardless of when exactly the rendering code had a chance to run. For example, even if the compositor has to process new window events, delaying the rendering by a few ms, the animation timing will remain exactly aligned to the monitor refresh cycle.
There are hence several properties that a compositor wants from its timing system.
- It should be possible to get the state of the animations at a specific time in the near future, for rendering a frame exactly timed to when the monitor will show it.
- This time override ability should be usable in tests to advance the time in a fully controlled fashion.
- Animations in response to user actions should begin at the moment when the action happens. For example, pressing a workspace switch key should start the animation at the instant when the user pressed the key (rather than, say, slightly in the future where we predicted the next monitor frame, which we had already rendered by now).
- During the processing of a single action, querying the current time should return the exact same value. Even if the processing finishes a few microseconds after it started, querying the time in the end should return the same thing. This generally makes writing code much more sane; otherwise you'd need to for example avoid reading the position of some element twice in a row, since it could have moved by one pixel in-between, screwing with the logic. Also, fetching the current system time can be quite expensive in terms of overhead.
- It should be reasonably easy to implement an animation slow-down preference, so all animations can be slowed down or sped up by the same factor.
The solution in niri is a LazyClock, a clock that remembers one timestamp.
Initially, the timestamp is empty, so when you ask LazyClock for the current time, it will fetch and return the system time, and also remember it.
Subsequently, it will keep returning the same timestamp that it had remembered.
You can also clear the timestamp, then LazyClock will fetch the system time anew when it's needed.
In niri, the timestamp is cleared at the end of every event loop iteration, right before going to sleep waiting for new events.
This way, anything that happens next (like a user key press) will fetch and use the most up-to-date timestamp as soon as one is needed, but then the processing code will keep getting the exact same timestamp, since LazyClock stores it.
You can also just manually set the timestamp to a specific value. This is how we render a frame for the predicted time of when the monitor will show it. Also, this is used by tests: they simply always set the timestamp and never use the system time.
Finally, there's an AdjustableClock wrapper on top that provides the ability to control the slow-down rate by modifying the timestamps returned by the clock.
An important detail is that with rate changes, timestamps from the AdjustableClock will drift away and become unrelated to the system time.
However, our target timestamp (for rendering) comes from the system time, so the override works directly on the underlying LazyClock.
That is, overriding the timestamp and then querying the AdjustableClock will return a different timestamp that is correct and consistent with the adjustments made by AdjustableClock.
This is reflected in the API by naming the function Clock::set_unadjusted() (and there's also Clock::now_unadjusted() to get the raw timestamp).
The clock is shared among all animations in niri through passing around and storing a reference-counted pointer. This way, overriding the time automatically applies to everything, whereas in tests we can use a separate clock per test so that they don't interfere with each other.